Cap
Difficulty: easy (?/10)
Type: CTF
OS: Linux
Ports/services exploited: -
Tools: Wireshark
Techniques: -
Keywords: Wireshark, Linux capabilities
1. Services enumeration
As usual, let’s perform a nmap scan with the flags -sV to have a verbose output, -O to enable OS detection, and -sC to enable the most common scripts scan.
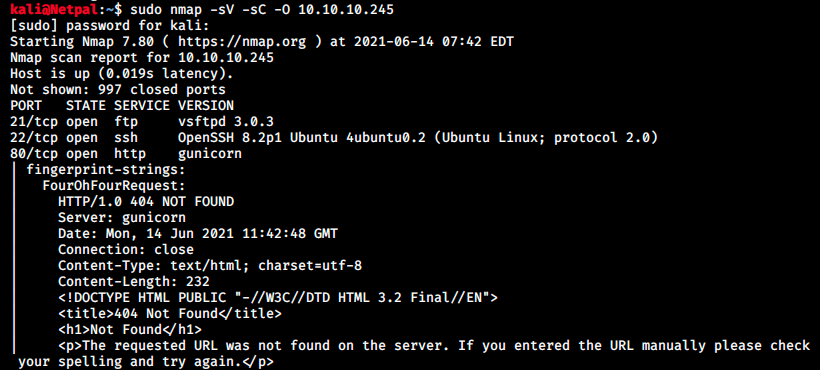
Note that we already know the machine is running Linux, but sometimes we get useful information regarding the version. We see there’s an FTP server, SSH and a web server running on the machine. Let’s have a look at those services.
2. Gaining a foothold
As usual, we can leave SSH aside for the moment. We will probably use it later, once we discover some credentials. The main lead is most likely going to be the web server, but let’s quickly check FTP first. In particular, we want to make sure anonymous FTP isn’t allowed. If it is the case, we might be able to connect anonymously and potentially retrieve useful data:

Apparently, anonymous FTP isn’t allowed (I tried with an empty password and a few other ones). I don’t remember for sure, but I think nmap would have told us if it was allowed.
Let’s now look at the web server. We browse at 10.10.10.245:
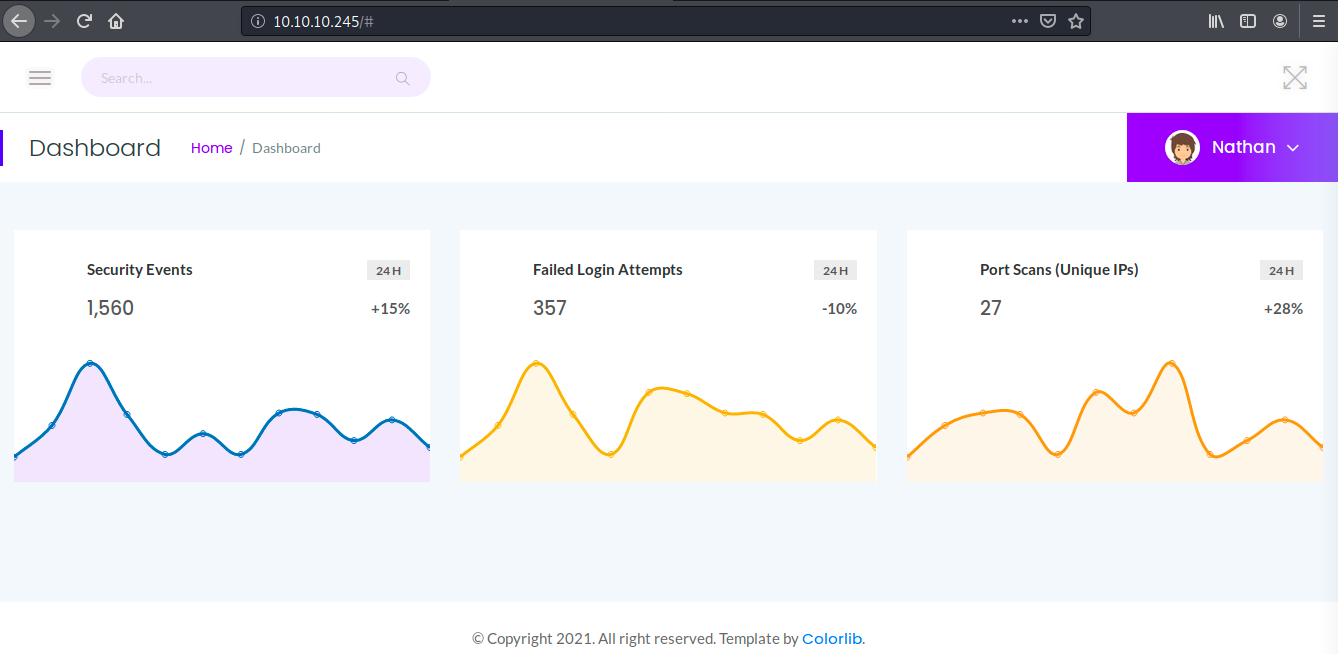
We see a dashboard with different statistics, and we’re already logged in as Nathan. There is a menu in the upper left of the page with different links: Dashboard (this is where we are currently), Security Snapshot (5 Second PCAP + Analysis), IP Config and Network Status.
While we look at those pages, let’s start dirbuster in the background:
sudo dirb http://10.10.10.245 -r
Note that the -r flag prevents the script from being recursive. Let’s look at “Network Status” for example:
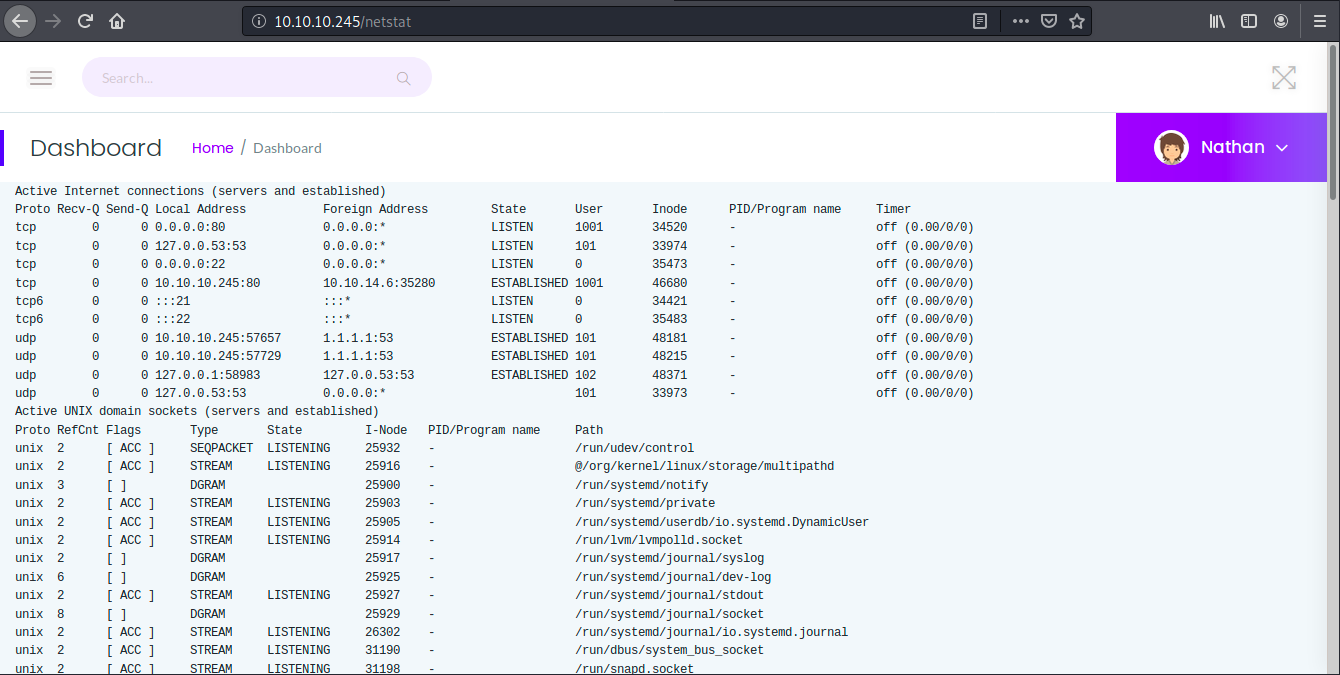
The output is somewhat similar to the one of the command ps -aux and lists the active connections (ps -aux lists the running processes). Dirbuster only found three directories: /data, /ip and /netstat.
Those 3 directories correspond to the different links in the menu.
It seems we have to find something on this web site. Before digging into it, let’s quickly try to SSH as Nathan with passwords such as “admin”, “1234”, “nathan”, and so on. We never know, it could be simpler than expected:
sudo ssh nathan@10.10.10.245
Sadly the password isn’t that obvious. Let’s get back at the website and have a look at the tab Security Snapshot (5 Second PCAP + Analysis):
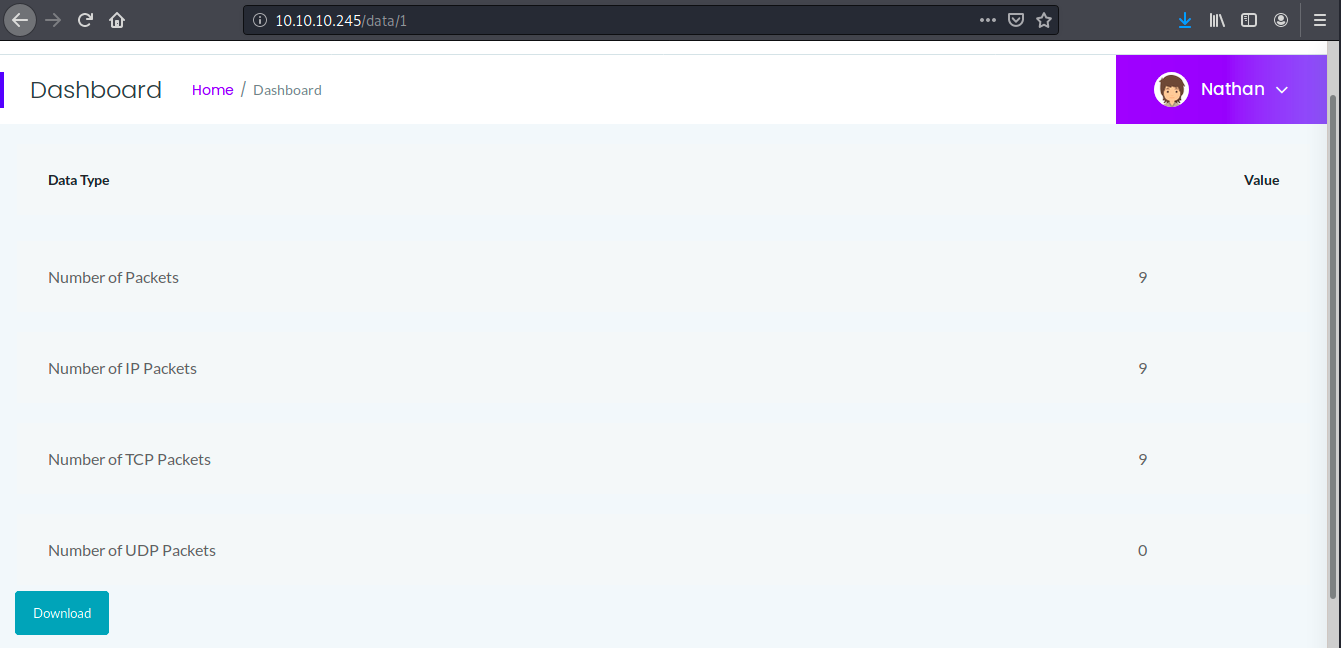
We see 9 TCP packets were sent over the last 5 seconds and were captured by pcap. We can download the resulting file and open it on Wireshark for example:
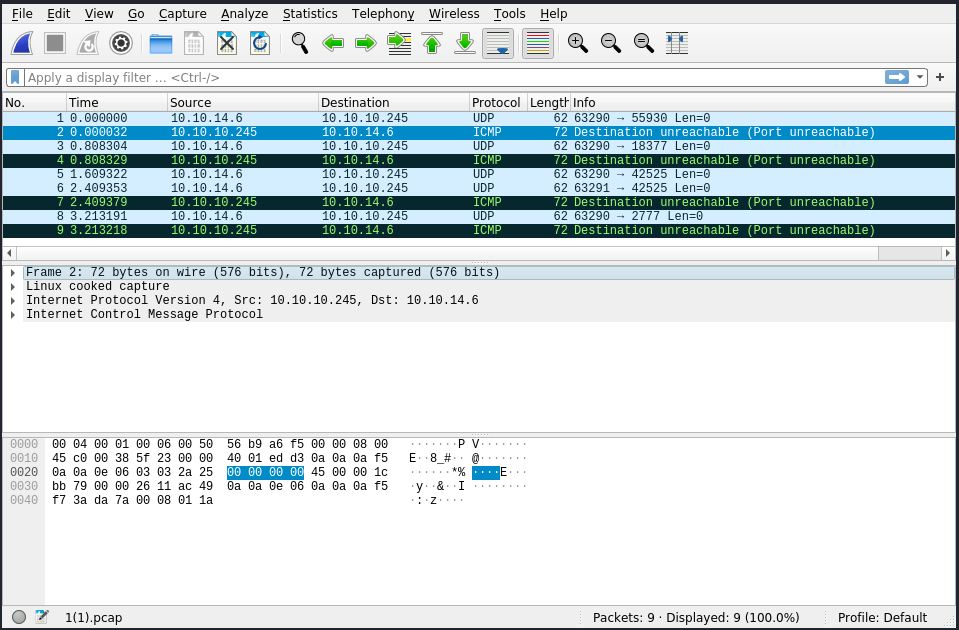
It’s weird the dashboard said 9 TCP packets, whereas Wireshark says it was UDP protocol. Anyways, we see the traffic between our machine (10.10.14.6) and the box (10.10.10.245). There’s nothing really interesting in this file. Going back to the website, I then got another dashboard, this time with 8 TCP packets. The url was different, 10.10.10.245/data/4 (it was 10.10.10.245/data/1 before). I downloaded the new file but there wasn’t anything there either. I’m not sure what makes the dashboard change, but we can manually alter the url. Note that if a file doesn’t exist, it just brings us back to the default page dashboard (for example 10.10.10.245/data/9).
After trying a few different numbers, we see one that looks different:
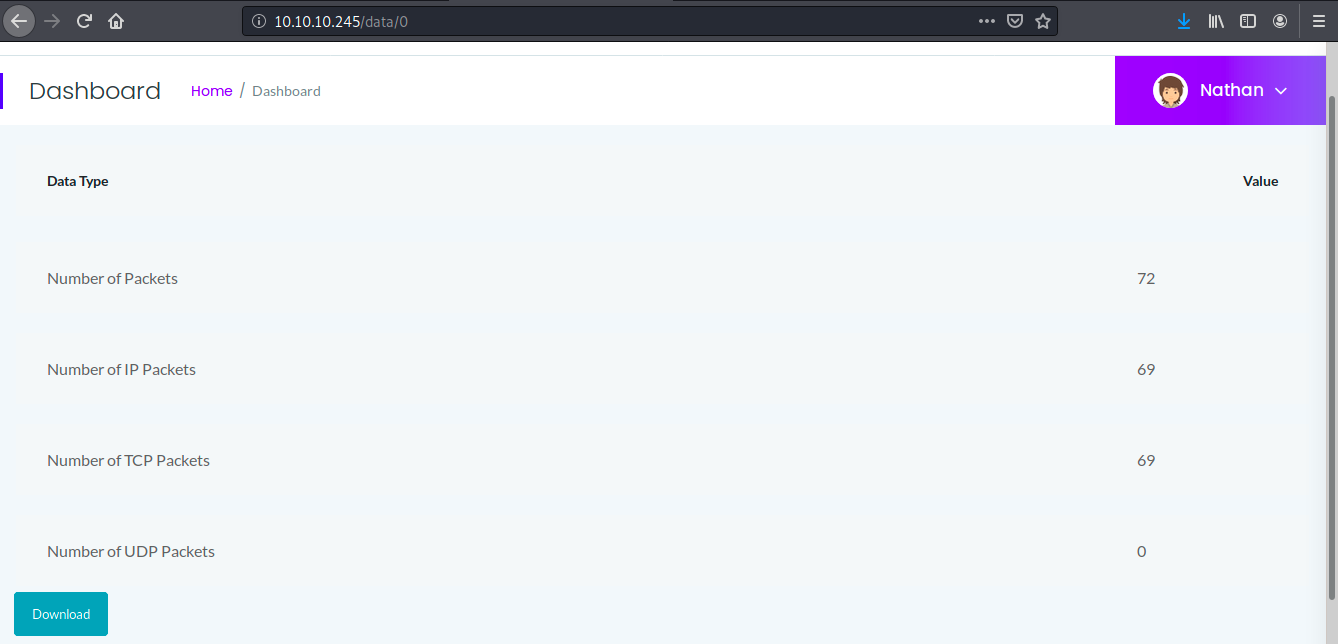
I don’t know if it means anything, but the number of IP packets doesn’t match the one of total packets. Let’s download this file and open it on Wireshark:
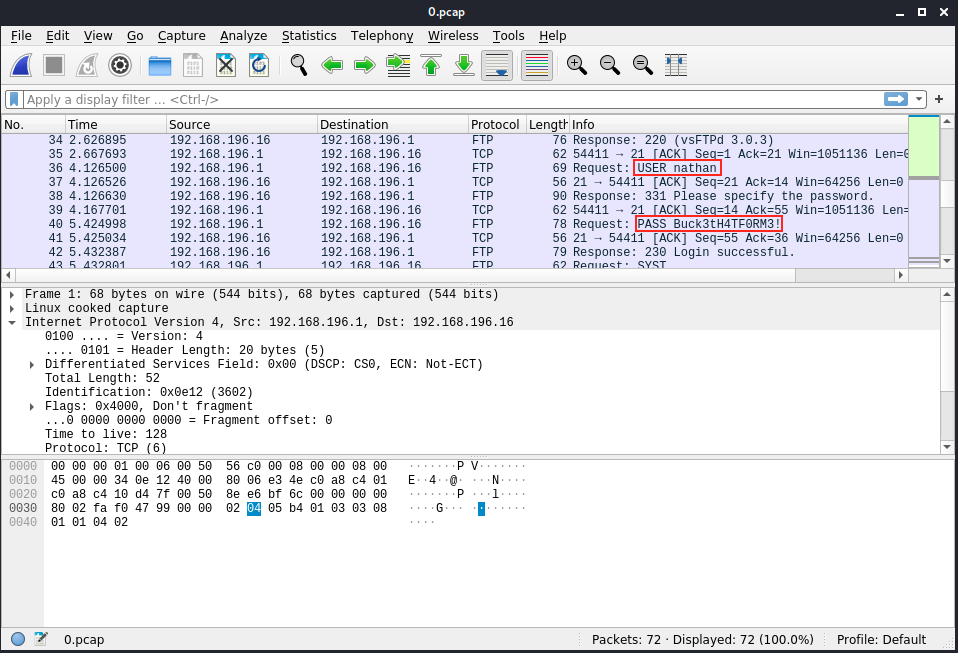
This time we see traffic between 192.168.196.1 and 192.168.196.16. The packet stream starts with a successful 3 ways handshake, then there’s a few get requests, and then lower (starting at packet 33), FTP connection traffic was captured. We see the user Nathan and the password in cleartext (“Buck3tH4TF0RM3!”). We see the connection was successful, so we can FTP into the server with those credentials:
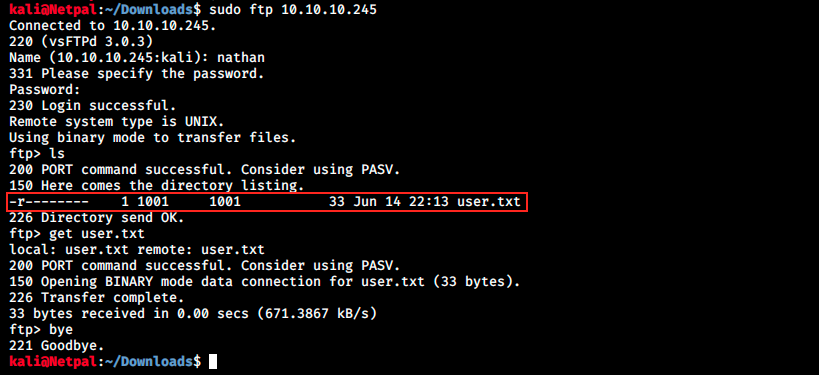
The first thing we see once connected to the server is the user flag. We can download it with the command get. Back on Kali, we find the file in the directory where the FTP command was issued:

3. Privilege escalation
Let’s do a quick manual enumeration of the files on the server. Instead of FTPing back in, we’ll use the same credentials to SSH into the server. That would be great to have a proper shell instead of issuing commands through FTP:
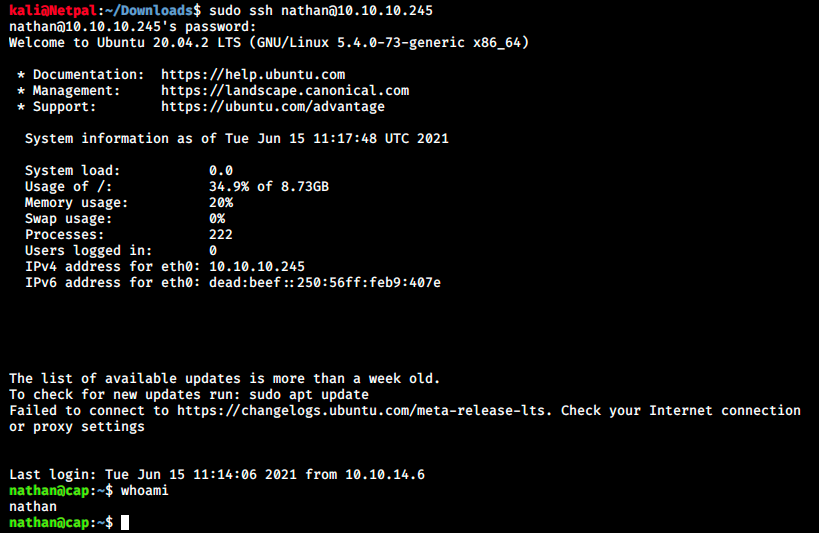
Great, it worked! We’re now going to go through the different directories (I described the main Linux directories in the Delivery writeup), looking for any interesting file/program, weak permissions, misconfigurations, and so on.
Here are some basic enumeration commands we can try:
# Info about current user
id || (whoami && groups) 2>/dev/null

# List all users
cat /etc/passwd | cut -d: -f1

# List users with console
cat /etc/passwd | grep "sh$"

# List superusers
awk -F: '($3 == "0") {print}' /etc/passwd

# Currently logged users
w

# Login history
last | tail

# Last log of each user
lastlog

# List all users and their groups
for i in $(cut -d":" -f1 /etc/passwd 2>/dev/null);do id $i;done 2>/dev/null | sort

# Current user PGP keys
gpg --list-keys 2>/dev/null

# Check commands you can execute with sudo
sudo -l

# Find all SUID binaries
find / -perm -4000 2>/dev/null
There are a lot more commands on https://book.hacktricks.xyz/linux-unix/privilege-escalation/. I didn’t find anything I could use… Let’s think about what’s happening on that box: it seems that that there’s a sniffing tool running (I saw tcpdump in the binaries (/sbin), or maybe pcap which would be the reason of this box name?). There’s also an ipconfig tab on the website which displays the output of the command, and a network status as we saw previously. Those commands are most likely ran by root. In fact, we can view the application’s source code in /var/www/html/app.py. We see there that the capturing tool is indeed tcpdump, the IP tab uses ifconfig and the network one uses netstat -aneop.
Anyways, manual enumeration didn’t reveal anything. We’ll now upload Linpeas to see if it does better! We start a web server on our machine:
sudo python -m SimpleHTTPServer
Note that we have to download the script linpeas.sh and place it the web directory (/var/www/html). Then we download it on the victim machine (I first created the .test directory in /tmp) and make it executable:

Finally we run it:
./linpeas.sh
The output is very long, so here’s only a tiny part of it but it could be what we’re looking for:
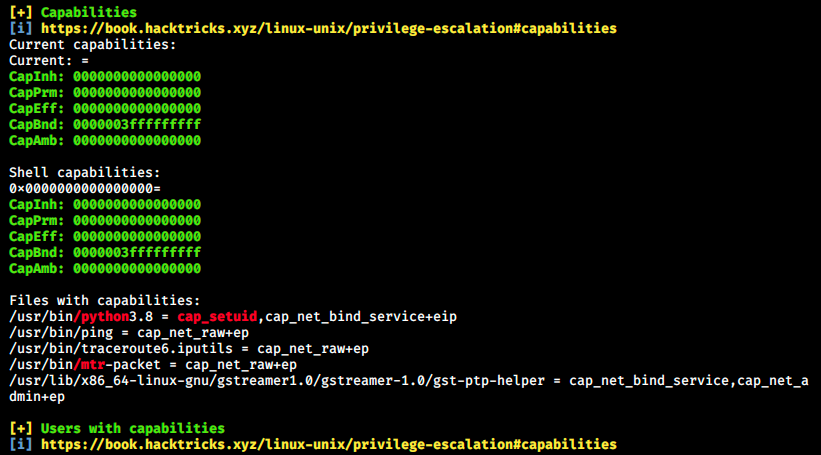
The name of the box could clearly be a reference to those capabilities. I’ve never heard of that, so let’s browse to the given link to learn more about it (https://book.hacktricks.xyz/linux-unix/privilege-escalation/linux-capabilities). I’ll resume the explanation here:
When the root user runs a process, he/she gets a “special treatment”. The kernel and applications skip the restriction of some activities when they see his/her ID of 0.
When a normal user runs a process, he/she is non-privileged. That means he/she can only access data that are owned by him/her, his/her group, or that is accessible to all users. However, the process might need more permissions at some point, for example to open a network socket. Normal users can’t open a socket (it requires root permissions). So, how can it do it?! Linux capabilities provide a subset of the available root privileges to a process.
We can list capabilities with the following command:
capsh --print
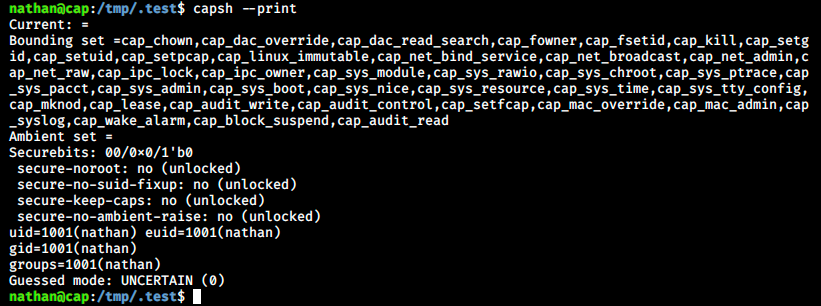
Here is a description of the first few listed capabilities:
- CAP_CHOWN: Allow user to make arbitratry change to files UIDs and GIDs (full filesystem access)
- CAP_DAC_OVERRIDE: This helps to bypass file read, write and execution permission checks (full filesystem access)
- CAP_DAC_READ_SEARCH: This only bypass file and directory read/execute permission checks
Thee are many capabilities in the command output, maybe one of them is the key to root! We also see Bounding set and Ambient set. From the article, they are part of the capabilities sets. With the bounding set (CapBnd in the output of Linpeas above), it is possible to restrict the capabilities a process may ever receive. Only capabilities that are present in this set will be allowed in the inheritable set (CapInh) and permitted set (CapPrm). The ambient set (CapAmb) applies to all non-SUID binaries without file capabilities.
There are many different capabilities, such as Process capabilities, Binaries capabilities, User capabilities, ….
| Let’s look at process capabilities (we can see them for a particular process by using the status file in the /proc directory. For example *cat /proc/1234/status | grep Cap*). This command returns 5 lines that look like the following: |
- CapInh: 0000000000000000
- CapPrm: 0000003fffffffff
- CapEff: 0000003fffffffff
- CapBnd: 0000003fffffffff
- CapAmb: 0000000000000000
Those are the sets we just described, and it’s exacty what we see in the output of Linpeas. We can decode the hex numbers to get the capabilities name with the following command:
capsh --decode=0000003fffffffff

Binaries capabilities can be used while executing (for example ping has the cap_net_raw capability to open an ICMP socket. If we remove that capability, the command no longer works (“Operation not permitted”)).
I voluntarily don’t get into too many details since I might be on the wrong way. Let’s get back at the capabilities returned by Linpeas and see if we can use them as a PE vector.
Linpeas found Shell as well as a few files capabilities. There’s a capability hightlighted in red, cap_setuid. This latter allows changing of the UID. At the end of the 2 listed capabilities, there is also +eip. ep means that the binary has all the capabilities. After searching capabilities exploit for python, I found a few examples and how to do it. The idea is that to use the cap_setuid capability to set the UID to 0 when we run python:

So we just used python that is running as root to spawn a shell as root!
My thoughts The user flag was not too hard to get, but I wouldn’t rate the root part as easy. It took me some time and introduced me to a new privesc vector on Linux that I didn’t know about. I just scratched the surface of capabilities, but now I know what it’s about and hopefully I will be able to use that again in the future!\